How to Brief a 3D Exterior Rendering: What to Send and How to Send It
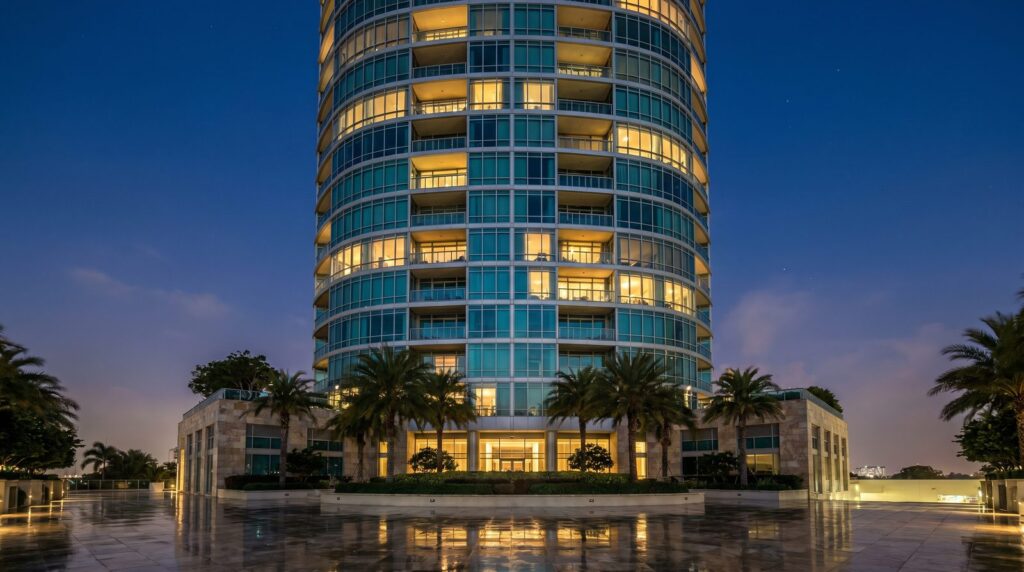
To get a photorealistic exterior render, send the studio your architectural drawings (CAD, PDF, or SketchUp), a clear material schedule with product names or finish codes, three to five reference images that show the look you want, your preferred camera positions, time-of-day, and basic site context — neighboring structures, landscaping intent, and any street or aerial view requirements. That complete package is what separates a first-pass render that’s 90% there from one that needs five rounds of revision.
What Files and Drawings Do You Need to Send?
Architectural drawings are the non-negotiable starting point. At minimum, a studio needs enough dimensional information to build an accurate 3D model of the structure — without it, every proportion is a guess.
Send as many of the following as you have available:
- Floor plans — every level, including roof plan if the roof form is complex.
- Elevations — all four faces, dimensioned. North, south, east, and west elevations let the artist understand facade depth, window reveals, and parapet heights.
- Sections — helpful for split-level sites or buildings with significant grade changes.
- 3D model file — if you have a SketchUp, Revit, or ArchiCAD model, share it. Even a rough massing model cuts modeling time significantly and reduces the risk of geometric errors.
- Site plan — shows the building footprint relative to the property boundary, roads, and neighboring structures.
PDF is fine if CAD isn’t available, but make sure the PDFs are to scale or include a scale bar. Unscaled “print to fit” PDFs are one of the most common causes of brief-stage delays in our studio work.
If you’re still in schematic design, a clean SketchUp massing model plus dimensioned elevations is usually enough to start. See our full rendering process guide for how files move through each production stage.
How Do You Describe the Materials, Finishes, and Cladding?
Material callouts are where most briefs fall short — and where the visual quality of the final render is largely decided. Vague descriptions like “light grey cladding” or “timber look” leave too much to interpretation.
For each facade material, specify:
- Product name and manufacturer — e.g., “James Hardie HardiePlank, Cobblestone” or “Nichiha Vintage Wood, Autumn Harvest.”
- Color code or finish reference — RAL, Dulux, or Benjamin Moore codes are exact and unambiguous.
- Coursing direction and scale — horizontal vs. vertical, board width, grout joint size for tile.
- Sheen level — matte, satin, or gloss affects how the material reads under sunlight or dusk lighting.
- Glazing type — clear, tinted, reflective, or frosted glass all render very differently.
If you have a finish schedule from your architect or specification document, attach it. A photo of a physical sample board is also useful — we regularly match renders to sample boards for developer pre-sales packages. Annotated elevation drawings that label each material zone are the clearest format of all.
What Reference Images Actually Help a Rendering Studio?
Reference images communicate intent faster than words. Three to five well-chosen images give the artist a shared visual language — they’re not copying those images, they’re calibrating tone, materiality, and atmosphere to your expectations.
The most useful references fall into distinct categories:
| Reference Type | What It Communicates | Where to Find It |
|---|---|---|
| Architectural style / massing | Overall form, window proportions, facade rhythm | Houzz, Dezeen, ArchDaily |
| Material / cladding finish | Exact texture, color, and reflectivity | Manufacturer websites, Pinterest boards |
| Lighting mood | Time of day, sky tone, shadow quality | Other renders you admire, photography |
| Landscaping and planting | Density, species type, hardscape style | Landscape architect plans, stock photography |
| Camera angle / composition | Viewing height, focal length feel, framing | Real-estate photography, competitor renders |
Avoid sending a single “inspiration” image and expecting the render to replicate it exactly — that’s a different project. Use references directionally: “we like the warmth of the lighting in this image” or “the landscaping density here is about right.”
How Do You Specify Lighting, Time of Day, and Camera Angles?
Lighting and camera position are creative decisions that have a direct impact on how marketable the final image is — and they’re decisions you should make before production starts, not after the first draft.
Time of day: The three standard options are golden-hour day, dusk/twilight, and night. Each serves a different marketing purpose. Day renders show materiality and massing clearly. Dusk renders — our most-requested setting for residential and mixed-use projects — create warmth and drama by balancing interior glow against a lit sky. Night renders work well for commercial and retail projects where signage and artificial lighting are part of the story. If you’re unsure which to choose, our guide on choosing render lighting: day, dusk, or night walks through the tradeoffs.
Camera angles: Specify at least one primary view and any secondary views. For each, describe:
- Viewing direction (e.g., “looking northeast from the street corner”)
- Approximate viewing height — pedestrian level (eye height ~5–6 ft), elevated, or aerial
- How much of the site should be in frame — tight on the facade, or wide to show landscaping and context
A marked-up site plan showing camera positions and viewing cones is the clearest way to communicate this. Alternatively, a Google Maps satellite screenshot with arrows drawn on it works perfectly well.
Sun position and season: For day renders, the sun angle matters. A building that faces west will look very different at 9 a.m. versus 4 p.m. If shadow patterns on neighboring properties are a planning concern, specify the date and time you want modeled.
What Site Context and Landscaping Details Should You Include?
A building rendered in a vacuum — floating on a white ground plane — looks like a diagram, not a development. Site context is what makes a render believable and marketable.
Provide as much of the following as is available:
- Landscape architect’s plan — planting species, hardscape materials, pool or water feature layout, fencing, and lighting fixture locations.
- Grading or civil plan — especially important for sloped sites, retaining walls, or buildings with significant grade changes at the entry.
- Street context — road width, sidewalk, street trees, and neighboring building heights. Google Street View screenshots of the actual site are genuinely useful.
- Neighboring structures — do you want them shown accurately, simplified, or omitted? This affects how much context the studio needs to model.
- Sky and environment — coastal, urban, suburban, or mountain setting? The background environment (real HDRI location or a generic sky) should match your actual project location.
For landscape-heavy projects — pools, resort amenities, outdoor living areas — a dedicated landscape brief is worth preparing separately. Our exterior rendering service covers full site environments including hardscape, planting, and water features.
How Does a Complete Brief Affect Turnaround Time and Revision Rounds?
A complete brief directly compresses turnaround time and reduces the revision rounds needed to reach sign-off. This is one of the clearest ROI levers a developer controls.
In our studio experience, projects that arrive with complete drawings, a material schedule, and clear camera direction typically reach a first-draft approval within the standard production window. Projects with incomplete briefs spend that same time in back-and-forth clarification — which delays the first draft and often triggers downstream revisions when assumptions get corrected late.
The most common brief gaps that cause revision rounds:
- Unspecified glazing type — the studio guesses, the client corrects in revision
- Missing roof material — often omitted from elevations, critical for aerial or elevated views
- No camera angle specified — the studio chooses a default, the client wants a different view
- Landscaping described as “TBD” — a placeholder landscape is built, then revised when the LA plan arrives
- Lighting mood not agreed — day render delivered, client wanted dusk
Use our 3D rendering project brief checklist to run through every item before you send files. Five minutes of preparation at brief stage routinely saves a full revision round.
What Happens If Your Brief Is Incomplete — and How to Fix It Fast?
An incomplete brief doesn’t mean a project can’t start — it means the studio needs to flag the gaps before modeling begins. The right approach is a structured brief review, not silence followed by a first draft built on wrong assumptions.
If you’re missing certain files or decisions at brief stage, here’s how to handle the most common situations:
- No 3D model yet: Send dimensioned PDFs. The studio will build the model from scratch — it takes longer, but it’s standard practice for early-stage projects.
- Materials not finalized: Brief what you have; flag the undecided items explicitly. The studio can use placeholder materials and swap them in a targeted revision once you’ve confirmed selections.
- Landscape plan still in progress: A conceptual brief (“contemporary tropical, pool on the south side, dense planting at the boundary”) is enough to start. Detailed planting can be refined later.
- Camera angles undecided: Ask the studio for a camera recommendation based on the building’s strongest elevation — this is a normal part of the brief conversation.
The worst outcome is sending an incomplete brief without flagging the gaps. The studio makes assumptions, the first draft misses the mark, and revision rounds multiply. Transparency at brief stage is always faster than corrections mid-production.
Frequently Asked Questions
What is the minimum I need to send to start a 3D exterior rendering?
At minimum, send dimensioned floor plans and all four elevations in PDF or CAD format, plus a basic material description for the main facade elements. A site plan and at least one reference image for lighting mood will prevent the most common early-stage assumptions. More detail always means fewer revisions.
Do I need a finished design before briefing a rendering studio?
No. Studios regularly work from schematic-design drawings. A rough SketchUp massing model and dimensioned elevations are enough to start modeling. Just flag which elements are still in flux so the artist knows where to expect changes — and can structure the file to accommodate them efficiently.
How many camera angles should I include in my exterior rendering brief?
For a standard marketing package, two to three angles — a primary street-level hero view, a secondary angle showing a different facade or the entry, and optionally an elevated or aerial view — covers most use cases. Specify each with a viewing direction, height, and approximate framing intent.
What file format should I use to send drawings?
DWG or DXF (AutoCAD) is preferred because dimensions are exact and the file can be imported directly into 3D modeling software. PDF is acceptable if CAD isn’t available — just ensure the PDF is to scale. SketchUp (.skp), Revit (.rvt), or ArchiCAD (.pln) model files are also welcome and reduce modeling time considerably.
How do I brief the landscaping if my landscape plan isn’t finished yet?
A written description of intent is enough to start: plant density, species type (tropical, native, formal hedging), hardscape material, and any water features. The studio will build a conceptual landscape that can be updated in a targeted revision once your landscape architect’s plan is finalized.
Ready to put together your brief? Explore our exterior rendering service to see the file formats we accept and how the production process works — or send us your drawings and we’ll review your brief and confirm what we need to get started.
Last updated: August 2026