Renders for Planning Approval: What Architects Need
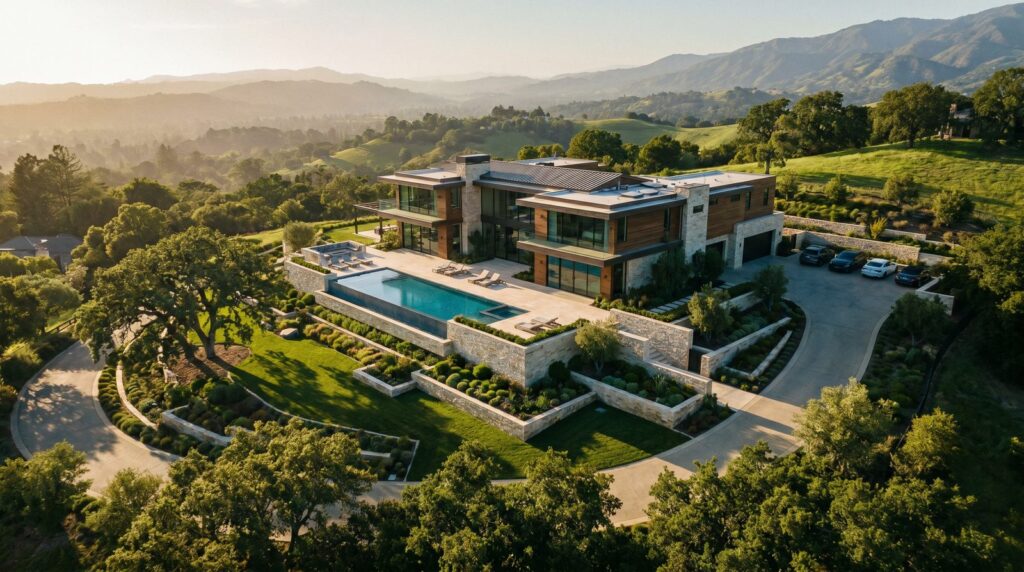
Planning boards and municipal reviewers typically require a specific set of architectural renders that differ meaningfully from marketing visuals: street-level context views showing the proposed building within its existing streetscape, accurate shadow studies, site-relationship diagrams, and elevations rendered to a measured, non-glamorized level of photorealism. The goal is legibility and factual accuracy — not sales appeal. Architects who understand this distinction assemble stronger submission packages and face fewer revision cycles.
What Makes a Render ‘Planning-Board Ready’ vs a Marketing Render?
A planning-board render is a factual document first and a visual second. Where a marketing render maximizes drama — golden-hour lighting, lifestyle staging, wide-angle lenses — a planning render prioritizes accuracy: true proportions, realistic material colors under neutral daylight, and honest site context. Reviewers are checking compliance, not admiring the design.
Practically, this means:
- Neutral daylight or overcast sky rather than dusk or cinematic lighting, so material colors read true and shadows are not exaggerated.
- Accurate neighboring structures modeled or photo-composited into the scene — reviewers want to see how the proposed building sits relative to adjacent buildings, not an isolated object on a white background.
- No lifestyle staging (no people, cars, or landscaping that misrepresents the approved scope).
- Measured camera positions — eye-level at roughly 5–6 ft, at distances that reflect a pedestrian’s actual view from the street or property line.
- Consistent scale indicators such as human figures at true height.
Marketing renders are optimized for emotion; planning renders are optimized for decision-making. Both can come from the same model — but they are produced with different camera settings, lighting rigs, and post-production intent.
Which Views Do Most US Planning Departments Request?
Most US planning departments ask for a combination of street-level perspective views, elevations, and a site or aerial context view. The exact list varies by jurisdiction, but the following set covers the majority of zoning and design-review submissions we see.
| View Type | Purpose | Typical Camera Position |
|---|---|---|
| Primary street-level perspective | Shows the main façade in streetscape context | Eye-level from the opposite sidewalk or across the street |
| Secondary / corner perspective | Reveals massing at the corner and side elevation | Eye-level from the corner, 45° to the building |
| Aerial / bird’s-eye context | Shows site footprint, parking, and relationship to adjacent parcels | 45°–60° overhead, wide enough to show neighboring lots |
| Shadow / sun study | Demonstrates shadow impact on neighboring properties at key times of day | Same as street-level; rendered at 9 AM, noon, and 3 PM |
| Rendered elevations | Orthographic views showing material finishes and fenestration | True orthographic (no perspective distortion) |
| Streetscape composite | Proposed building blended into a photo of the existing street | Matched to a real photograph taken from the public right-of-way |
Some jurisdictions — particularly those with active historic-preservation boards or coastal overlay zones — add a photomontage requirement: the render must be composited onto a surveyed photograph taken from a fixed, documented camera point. If your project falls under such a requirement, confirm the survey methodology with the reviewer before commissioning the render package.
How Do Context and Site-Relationship Renders Support Approval Applications?
Context renders answer the question every planning board member is silently asking: “How will this building affect what I already know?” They do this by placing the proposed structure inside a 3D model of the existing block — including neighboring rooflines, setbacks, street trees, and adjacent building materials.
In our exterior work across US markets, context accuracy is the single factor that most often determines whether a board requests a continuance. A render that shows the proposed building floating in isolation gives reviewers no basis for judgment; a render that accurately models the two adjacent structures and the street trees gives them everything they need.
For infill projects in particular, the aerial context view is often more persuasive than any street-level angle. It shows lot coverage, parking layout, pedestrian access, and the relationship of the new footprint to neighboring parcels — all in one image. Our exterior rendering service routinely includes aerial context views as part of planning packages for exactly this reason.
Site-relationship renders also serve a secondary purpose: they become the reference images that neighboring property owners see at public hearings. Clear, honest context renders reduce community opposition by showing, not just claiming, that the project respects the existing neighborhood scale.
What Level of Photorealism Is Appropriate for a Zoning Submission?
The appropriate realism level is “accurate and legible” — not “photorealistic at all costs.” Over-rendered images can actually work against an architect in a planning context, because they look like marketing material and invite skepticism from reviewers who wonder what is being hidden or exaggerated.
A practical realism spectrum for planning submissions:
- Schematic / massing renders: Solid-color or clay-model renders showing pure form and massing. Appropriate for early design-review meetings where the design is not yet finalized.
- Design-development renders: Accurate materials and fenestration, neutral daylight, no lifestyle staging. The standard for most zoning and design-review boards.
- Photomontage composites: The render is composited onto a real photograph of the site. Required by some jurisdictions, especially for projects near historic districts or with height-impact concerns. This demands the highest geometric accuracy.
PBR (physically based rendering) materials are appropriate at the design-development stage because they accurately represent how a material — brick, glass, metal panel — reflects light under real-world conditions. That accuracy is exactly what reviewers need. What should be avoided is post-production color grading, bloom effects, or dramatic sky replacements that make the image feel like an advertisement.
For more on how photorealism is calibrated for different audiences, see our guide to rendering for architects.
How to Brief Your Studio for a Planning-Approval Render Package?
A well-structured brief gets you accurate renders faster and avoids costly revision rounds. For a planning submission, the brief needs to go beyond aesthetics and include jurisdictional requirements.
Here is what to provide when briefing a visualization studio:
- Jurisdiction requirements: The specific views, scales, and any photomontage protocols listed in the planning department’s submission checklist. If the department has a design-review guideline document, share it.
- Survey data and site photographs: For photomontage work, a licensed surveyor’s camera-position data is mandatory. For standard context renders, provide recent street-level photographs of the site and adjacent buildings.
- Current architectural drawings: Floor plans, elevations, and sections at design-development stage or later. Schematic sketches produce schematic renders — if you need accurate material representation, the drawings must show it.
- Material specifications: Brick color, glass type, metal panel finish, roofing material. Reference manufacturer names and product codes where possible.
- Neighboring building data: Heights, setbacks, and façade materials of adjacent structures. GIS data or Google Street View links are helpful; measured drawings are better.
- Submission deadline and review date: Work backward from the submission deadline, not the hearing date. Most planning departments require materials several weeks before the hearing.
Our project brief checklist covers the full documentation set in detail. For planning-specific packages, the context and survey data sections are the ones most often left incomplete — and they are the ones that cause the most delays.
Can the Same Renders Be Repurposed for Investor Decks After Approval?
Yes — with targeted post-production adjustments. The underlying 3D model built for a planning submission is fully reusable. Once approval is secured, the same geometry can be re-lit, re-staged, and re-rendered for marketing or investor purposes without rebuilding from scratch.
The typical workflow after approval:
- Re-light the scene for a dusk or golden-hour render that reads as aspirational rather than documentary.
- Add lifestyle elements — landscaping, people, vehicles — that were deliberately omitted from the planning package.
- Produce interior renders from the same model for investor decks and pre-sales materials.
- Optionally, commission a walkthrough animation from the approved model for a leasing or investment presentation.
This model-reuse approach is one of the most efficient ways to manage visualization spend across a project lifecycle. The planning package pays for the base model; every subsequent marketing asset is incremental cost on top of an asset you already own. Our full workflow for this is covered in the approvals and competitions guide.
How Far in Advance Should Architects Commission Approval Renders?
Commission your planning renders at least four to six weeks before your submission deadline — and longer if photomontage survey work is involved. Here is why the timeline compresses faster than most architects expect:
- Survey scheduling: If photomontage is required, a licensed surveyor must document the camera position before the studio can begin. Surveyor availability adds one to two weeks minimum.
- Context modeling: Accurately modeling neighboring structures from photographs and GIS data takes time. This is not a task that can be rushed without compromising the accuracy that the submission requires.
- Revision cycles: Planning renders typically go through two to three rounds of review — first with the architect, then with the project team or client. Each round takes two to four business days.
- Submission formatting: Most planning departments require renders at specific resolutions, file formats, and sometimes with title blocks or scale bars embedded. Formatting takes time that is easy to underestimate.
As a rule: if you have a firm hearing date, count backward six weeks and that is the latest you should be briefing a studio. Eight weeks is comfortable. For large mixed-use or high-rise projects where the view count is higher and context modeling is more complex, ten to twelve weeks is not unusual.
If you are working within a compressed timeline, discuss it upfront with your studio — expedited delivery is often possible, but it affects scheduling and should be agreed before work begins, not after.
Frequently Asked Questions
Do planning departments accept renders produced with AI tools?
Most US planning departments do not specify the production method — they specify the output requirements (accuracy, scale, view angles). AI-generated images that cannot be tied to measured architectural drawings are generally not appropriate for planning submissions because they cannot be verified for dimensional accuracy. Renders produced from a model built to the actual design documents remain the standard.
What is a photomontage, and when is it required for planning submissions?
A photomontage is a render composited onto a real photograph of the existing site, taken from a surveyed and documented camera position. It is required by some jurisdictions — particularly those with historic-preservation overlays or coastal height restrictions — to give reviewers a direct, like-for-like comparison between the existing condition and the proposed building. The camera position must be surveyed, not estimated.
How many views should a standard planning render package include?
A standard package for a single-building submission typically includes three to six views: a primary street-level perspective, a secondary corner view, an aerial context view, and rendered elevations. Shadow studies and photomontages are added when the jurisdiction or project type requires them. Always verify the specific requirements with the planning department before commissioning.
Can renders created for planning approval be used in pre-sales marketing?
The underlying 3D model can be reused for marketing renders, but the planning renders themselves — with neutral lighting and no staging — are not suitable for marketing use without post-production adjustments. Re-lighting, adding landscaping and lifestyle elements, and producing dusk or interior variants from the approved model is the standard approach, and it is significantly more cost-efficient than starting a new model from scratch.
What file formats do planning departments typically require for submitted renders?
Most US planning departments accept high-resolution PDF or JPEG files, often with a minimum resolution specified (commonly 150–300 DPI at the printed sheet size). Some departments require renders embedded in a specific submission template with title blocks. Confirm the format requirements with the planning department’s submission checklist before the studio begins final rendering — reformatting after the fact adds unnecessary time.
Ready to put together a planning render package for your next submission? Visit our exterior rendering service page or contact the studio to discuss your project timeline and jurisdiction requirements.
Last updated: August 2026