Commercial Building Renders: A Design-Phase Guide
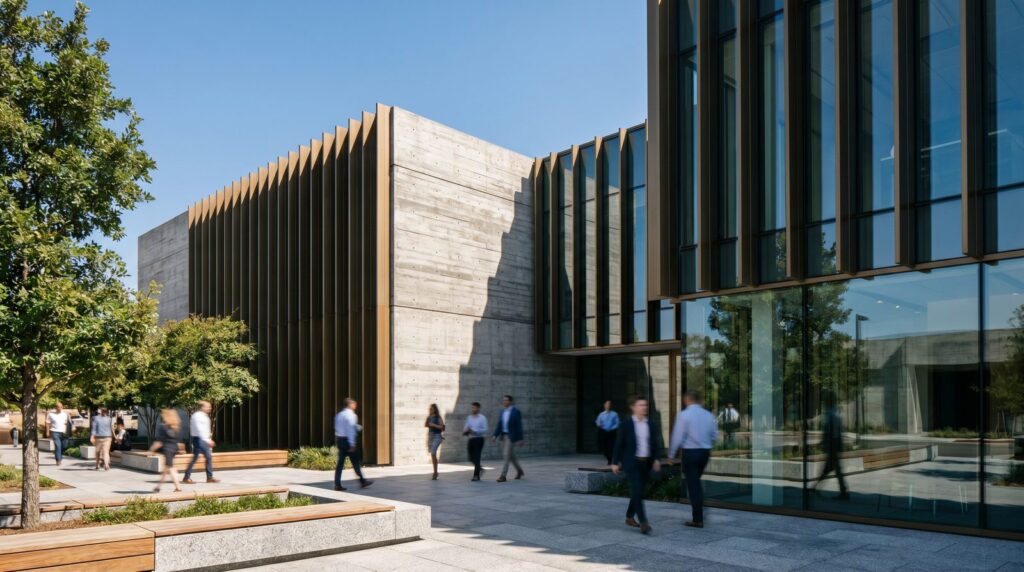
Architects and developers use 3D rendering throughout the commercial building design phase to test massing decisions, align stakeholders, and produce investor- or approval-ready imagery — all before a shovel breaks ground. The most valuable deliverables shift by phase: loose massing studies in Schematic Design, polished photorealistic exteriors and key interior views in Design Development, and construction-document-grade images for pre-leasing or permitting. Getting the timing right is what separates renders that drive decisions from renders that arrive too late to matter.
When in the Design Phase Should You Commission Commercial Renders?
Commission your first renders as soon as the massing is stable enough to defend — typically mid-Schematic Design. Waiting until Design Development feels safer, but it costs you the window where renders actually change decisions. Early massing studies are intentionally loose; they exist to answer “does this building read correctly on the skyline or streetscape?” not to showcase finishes.
A practical rule: if your team is debating two or more massing options, that debate is worth resolving with a render, not a floor-plan printout. A simple massing render produced at the right moment can collapse weeks of internal back-and-forth and give the design team a shared reference point before costly drawings are locked.
For projects that require public hearings, planning-board approvals, or design-review committees, factor in the render production timeline when scheduling submissions. Most commercial exterior renders require 7–14 business days from a complete file handoff, and rush timelines are possible but add complexity.
Schematic vs Design Development: Which Phase Needs Renders First?
Schematic Design needs renders first — but a different kind of render than most people picture. In SD, the goal is massing clarity, not photorealism. These images show scale, proportion, and site relationship. Materials are approximate; glazing ratios are indicative. The audience is typically the internal design team and the ownership group, not the public.
By Design Development, the building’s form is committed. DD renders are where photorealism pays off. At this stage, you’re selecting cladding systems, curtain-wall profiles, signage placement, and landscape integration. Renders produced here are the ones that appear in investor decks, planning submissions, and early marketing collateral.
| Design Phase | Render Type | Primary Purpose | Typical Audience |
|---|---|---|---|
| Schematic Design (SD) | Massing / concept studies | Test form, scale, site fit | Design team, ownership |
| Design Development (DD) | Photorealistic exterior & interior | Stakeholder buy-in, approvals, marketing | Investors, planners, tenants, public |
| Construction Documents (CD) | Final marketing renders / animations | Pre-leasing, pre-sales, PR | Brokers, tenants, press |
One important note: the file handoff requirements differ significantly between phases. SD massing studies can be produced from a Revit mass model or even a SketchUp block. DD renders need more resolved geometry — curtain-wall grids, canopy details, landscape planting beds — to look credible.
Exterior Massing Renders vs Photorealistic Renders: What’s the Difference?
Massing renders and photorealistic renders serve fundamentally different purposes, and confusing them is one of the most common briefing mistakes on commercial projects.
A massing render is a simplified, often monochrome or single-material image that communicates volume, height, setbacks, and site context. It deliberately omits material detail so the viewer focuses on form. These are fast to produce, easy to revise, and appropriate for SD-phase conversations.
A photorealistic render uses physically-based rendering (PBR) materials, accurate sun/sky or HDRI lighting, high-resolution textures, and post-production compositing to produce an image that reads as a photograph of the finished building. Global illumination, reflections in glazing, and shadow quality all contribute to the sense of reality. These images take longer to produce and require more resolved input geometry — but they are the deliverable that moves investors and leasing prospects.
For our commercial exterior rendering work, we typically recommend a two-stage approach: a quick massing pass during SD to validate form, followed by full photorealistic production once DD geometry is locked. This prevents expensive revisions to near-finished renders caused by late design changes.
Which Stakeholders Need to See Renders — and What Do They Each Look For?
Different stakeholders extract different information from the same render, and a well-structured view package addresses each audience deliberately.
- Ownership / developer: Wants to see the building reading as premium and market-appropriate. Looks at street presence, signage visibility, and how the project photographs for marketing materials.
- Investors / lenders: Focused on credibility and completeness. A polished render signals that the project is past concept stage and that the team is serious. Aerial context views that show site access and surrounding development are particularly useful here.
- Planning boards & design-review committees: Look for code compliance signals — setbacks, height relative to neighbors, pedestrian-scale detailing, landscape buffers. A street-level view from the public right-of-way is almost always required.
- Prospective tenants / anchor users: Care about identity, visibility, and how their brand will sit within the building. Retail and office tenants want to see the entry experience and signage zones.
- Brokers: Need images that reproduce well in PDF brochures and online listings. Clean, well-lit daytime and dusk views with minimal clutter perform best in leasing campaigns.
- Contractors (pre-bid): Occasionally use renders to understand design intent for complex facade assemblies, though they rely more heavily on CDs. A render can reduce RFI volume for intricate cladding systems.
Understanding who will use each image before briefing the studio lets you specify the right camera angles, lighting conditions, and entourage (people, vehicles, landscaping) for each view — rather than producing generic images that serve no audience particularly well. Our project brief checklist walks through exactly these decisions.
How Many Views Does a Typical Commercial Building Render Package Include?
A standard commercial building render package for a mid-rise office, retail, or mixed-use project typically includes three to six exterior views and, depending on the project type, two to four interior or lobby views. Here is how most packages break down:
- Primary street-level hero view: The main facade from the pedestrian approach. This is the image used in every deck and brochure.
- Secondary street-level view: The secondary facade or corner condition, often required for planning submissions.
- Aerial or elevated view: Shows site context, roof design, and relationship to neighboring structures. Particularly important for mixed-use projects with rooftop amenities.
- Entry / arrival view: Close-in view of the main entrance, canopy, and ground-floor retail or lobby glazing.
- Dusk or evening view: One dusk view is standard for marketing — interior lighting activates the facade and creates a sense of life. Dusk images consistently outperform daytime images in leasing campaigns based on our studio’s experience across commercial projects.
- Interior key spaces: Lobby, spec office suite, or anchor-tenant retail space. The number depends on the leasing strategy.
Larger or more complex projects — a multi-building campus, a mixed-use tower with ground-floor retail — may warrant eight to twelve views. The right number is determined by the stakeholder map above, not by a formula. See our broader guide on commercial building rendering for project-type-specific view counts.
What Files Does Your Architect Need to Provide the Rendering Studio?
The quality and speed of your renders depend almost entirely on the quality of the files you provide. Incomplete or mismatched handoffs are the single most common cause of delays and revision rounds on commercial projects.
Here is what a well-prepared file handoff includes:
- 3D model: Revit (.rvt or exported .dwg/.fbx/.obj), SketchUp (.skp), or Rhino (.3dm). The model should reflect the current design intent — not a version from two weeks ago. If the model has placeholder masses for certain elements, flag them explicitly.
- Site plan with context: Neighboring building footprints, road widths, landscape zones, and north arrow. Even a 2D AutoCAD site plan helps the studio build accurate site context geometry.
- Elevations and sections: PDF or CAD elevations showing facade articulation, floor-to-floor heights, and material zones. These are the reference documents the artist uses to verify the 3D model.
- Material and finish schedule: Specify cladding systems, glazing type (clear, fritted, tinted), metal finishes, and ground-floor materials. Reference product names or manufacturer specs where possible.
- Landscape and civil context: Planting plans, paving materials, site furniture, and any civil grading information that affects the base plane.
- Reference imagery: Precedent images showing the desired aesthetic, material quality, and lighting mood. A well-curated reference board saves more revision rounds than any other single input.
- Camera brief: Approximate camera positions or a marked-up site plan showing desired view angles. If you have specific planning-submission requirements (e.g., view from a named intersection), state them explicitly.
Our 3D rendering project brief checklist covers every item in this list in detail, with notes on minimum geometry requirements by phase.
How Long Does a Commercial Building Render Take to Produce?
Production timelines for commercial building renders depend on complexity, view count, and how complete the input files are. As a general guide based on our studio’s workflow:
| Render Type | Typical Production Time | Key Variables |
|---|---|---|
| SD massing study (1–2 views) | 3–5 business days | Model completeness, revision rounds |
| DD photorealistic exterior (3–5 views) | 7–14 business days | Facade complexity, material detail, site context |
| Full package (exterior + interior, 6–10 views) | 14–21 business days | Interior FF&E complexity, number of unique spaces |
| Architectural animation (30–90 sec) | 3–6 weeks | Scene complexity, render resolution, revision scope |
Rush delivery is possible for most still-render projects and typically compresses the timeline by 30–50%, but requires a complete file handoff on day one and a streamlined revision process. The biggest schedule risk on any commercial render project is not the studio’s production time — it is an incomplete or evolving model. A model that changes significantly after production begins effectively restarts the process.
For projects with hard deadlines (planning submissions, investor presentations, groundbreaking events), build the render timeline backward from the deadline, account for one round of revisions, and then set the file-handoff date. That sequence almost always produces better results than commissioning renders and hoping the schedule works out.
For developers who need renders that work as hard as the project does — from planning boards to pre-leasing — our real estate rendering services cover the full commercial design-phase workflow.
Frequently Asked Questions
Can we start renders before the design is fully resolved?
Yes — and for massing studies, you should. Schematic-phase renders are intentionally produced from incomplete models. The key is being explicit with the studio about what is resolved and what is placeholder. Attempting photorealistic renders from an unresolved model, however, produces images that require expensive rework as the design evolves.
What is the difference between a rendering studio and an in-house BIM team producing images?
BIM teams produce documentation-grade views optimized for accuracy and coordination. A dedicated rendering studio produces images optimized for perception — photorealistic lighting, human-scale entourage, post-production color grading, and output formats suited to print and digital marketing. Both have a role; they serve different audiences and different deliverable standards.
Do we need a separate render for every planning jurisdiction?
Not always, but planning boards frequently specify required viewpoints — from a named intersection, at a defined scale, or with context buildings shown to a minimum distance. Confirm the submission requirements with your planning consultant before briefing camera angles. Producing the wrong view from the wrong location can delay an approval cycle by months.
How much does a commercial building render package cost?
Cost is driven by view count, facade complexity, interior scope, and timeline. A simple three-view exterior package for a low-rise commercial building costs significantly less than a full exterior-plus-interior package for a multi-story mixed-use project with a complex curtain-wall system. For a detailed breakdown of the factors that affect pricing, visit our 3D rendering cost guide.
What output formats should we request for a commercial render package?
Request high-resolution TIFFs or layered PSDs for print and large-format use, plus web-optimized JPEGs for decks and digital marketing. If the images will appear in planning submissions, confirm the required DPI and page size with the jurisdiction. For social media and email campaigns, ask for cropped versions at platform-native aspect ratios — this avoids awkward auto-cropping that cuts off the building.
Last updated: October 2026