Renders for Planning Approval: What Architects Need
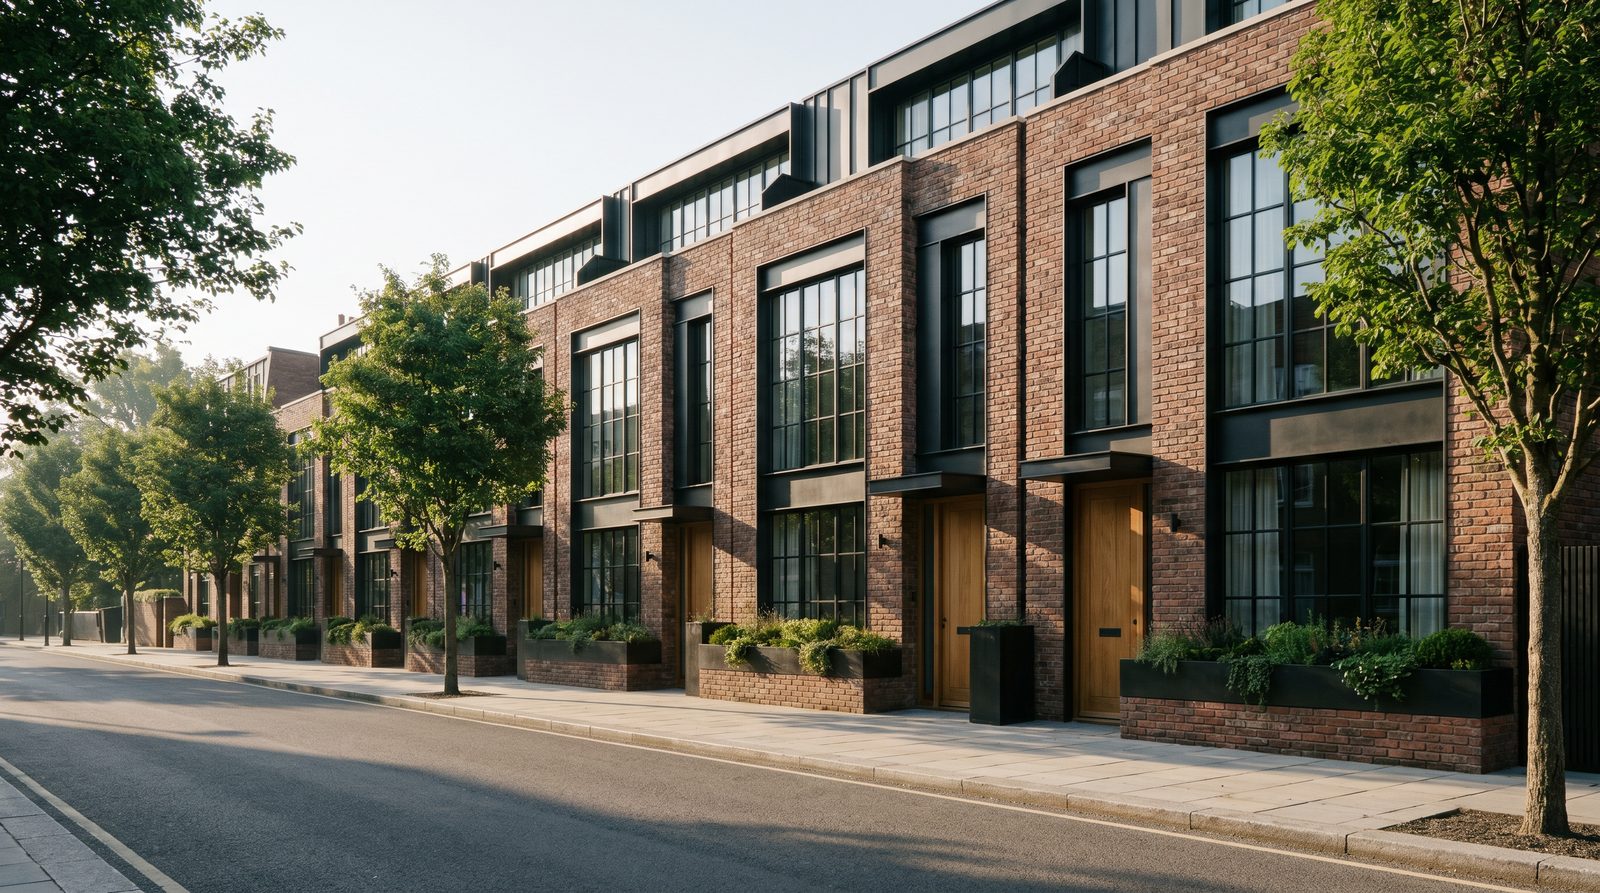
Renders for planning approval need to do one specific job: give a planning board, design-review committee, or zoning officer a clear, accurate picture of what will be built and how it fits the surrounding context. That means photorealistic exterior views from street level, an aerial or site-context view, accurate material representation, and correctly scaled neighboring structures — all delivered at print-ready resolution. Get those elements right and the visuals do the persuasion work for you.
Why Planning Boards Reject Renders — and What They Actually Want
Planning reviewers are not looking for marketing imagery. They are evaluating massing, setbacks, material compatibility, shadow impact, and neighborhood scale. Renders that look like sales brochures — dramatic drone angles, saturated skies, no neighboring buildings — raise immediate red flags. What reviewers want is accuracy and context, not polish for its own sake.
Common reasons renders fail at the planning stage:
- Missing context: neighboring structures, street furniture, and existing landscaping are absent or approximate.
- Unverifiable materials: generic brick or cladding textures that do not correspond to the specified product.
- Misleading angles: views chosen to minimize perceived bulk rather than represent true street presence.
- Low resolution: images that pixelate when printed at A1 or larger for board presentations.
- No scale reference: no people, vehicles, or adjacent structures to anchor the building's true height.
Addressing each of these in the brief to your visualization studio is the single fastest way to move an application forward.
Which Render Types Are Required for Planning Submissions
Most planning applications benefit from a core set of three to five views, each serving a distinct review purpose. The exact number varies by jurisdiction and project scale, but the following types cover the majority of US design-review and planning-board requirements.
| Render Type | Primary Purpose | Typical View | Key Details to Include |
|---|---|---|---|
| Street-level exterior | Show massing, façade, and street presence | Eye-level, 45° angle from sidewalk | Neighboring buildings, street trees, pedestrians, correct setbacks |
| Context / aerial view | Demonstrate site fit and massing relative to block | 45° overhead, 50–150 ft altitude | Full block, adjacent rooflines, parking, landscaping |
| Rear / side elevation render | Address neighbor impact, privacy, and bulk | Straight-on elevation or slight angle | Fence lines, grade changes, window positions |
| Night / dusk exterior | Show lighting impact on neighborhood | Same as street-level | Lit windows, exterior fixtures, spill light onto sidewalk |
| Landscape / site plan render | Show soft landscaping, hardscape, and tree canopy | Plan oblique or eye-level courtyard | Planting species (or genus), paving materials, drainage features |
For larger mixed-use or multifamily projects, some jurisdictions also request a photomontage — a render composited onto an actual site photograph — to demonstrate true visual impact. This is the most technically demanding deliverable and requires accurate camera-match data from a site survey.
What Information Architects Must Provide to the Visualization Studio
The quality of a planning render is directly proportional to the accuracy of the data behind it. Vague or incomplete briefs produce generic renders that reviewers will question. Here is what a studio needs to produce submission-ready work:
- Current architectural drawings: floor plans, elevations, and sections at minimum. BIM files (Revit, ArchiCAD) or CAD exports accelerate the modeling phase significantly.
- Specified materials: manufacturer names, product codes, and finish references for every visible exterior surface — cladding, glazing, roofing, and trim.
- Site survey or GIS data: accurate grade levels, neighboring building heights, and setback dimensions.
- Photographic site reference: street-level photos from the angles that will be rendered, taken at the time of day matching the intended lighting.
- Jurisdiction-specific requirements: any planning authority guidance on render style (photorealistic vs. line-drawing overlay), required view corridors, or shadow-study angles.
- Scale figures and vehicles: confirmation of whether human figures and cars should appear, and at what density.
From our work with architects on US planning submissions, the single most common delay is waiting on confirmed material specs. Locking those down before briefing the studio cuts revision rounds in half.
Photorealism vs. Stylized Renders for Planning: Which Is Right?
Photorealism is the default for planning submissions, but it is not always the only option. Some design-review boards — particularly those evaluating historic districts or sensitive streetscapes — actually prefer a more architectural, line-informed aesthetic that signals the render is a representation rather than a photograph. This avoids accusations of deception if the finished building looks different from a hyper-polished image.
The practical rule: check the planning authority's submission guidelines first. If they specify "photorealistic visualization," deliver exactly that. If they leave it open, photorealistic exterior renders with accurate materials and context are the most persuasive choice for the majority of US jurisdictions. Where a historic or conservation overlay applies, discuss a hybrid approach with your studio — photorealistic materials on an architecturally accurate model, with a slightly neutral sky and restrained entourage.
Resolution, File Format, and Delivery Specs
Planning submissions are printed. A render that looks sharp on screen at 1920 × 1080 pixels will pixelate badly at A1 (23 × 33 inches) at 150 dpi — the minimum acceptable for board presentations. Specify these requirements in writing when briefing your studio:
- Minimum resolution: 300 dpi at the intended print size. For A1 boards, that means at least 4,960 × 7,016 pixels.
- File format: uncompressed TIFF or high-quality JPEG (quality 12 / maximum). PDF export at 300 dpi is also common for digital portal submissions.
- Color profile: sRGB for screen/portal submissions; Adobe RGB or CMYK-convertible for print.
- Layered PSD or source file: useful if last-minute material changes are required before the hearing date.
Always confirm delivery specs with the planning portal before the studio starts rendering. Reprocessing a completed render to a different resolution is straightforward; remodeling because the wrong elevation was rendered is not.
How Renders Fit Into the Broader Planning Package
Renders are one component of a planning submission, not the whole document. They work best when integrated with shadow studies, material sample boards, and a design-and-access statement that references specific views. An interior render showing the lobby or a key amenity space can also support a planning application when the review includes ground-floor activation or public-realm requirements — our interior visualization work regularly supports exactly this kind of mixed-use submission.
For larger sites, an aerial or masterplan render provides the overview that individual street-level views cannot. Our work with custom home builders shows how even single-family infill projects benefit from a site-context aerial when the planning authority is assessing neighborhood character. For commercial projects, the same principle applies — see how commercial renders serve multiple audiences simultaneously, from planning boards to future tenants.
Common Mistakes That Delay Planning Approval
Beyond the visual quality issues covered earlier, these procedural and technical mistakes regularly cause planning delays:
- Submitting renders before drawings are fully coordinated — any discrepancy between the render and the drawings will be flagged.
- Using stock sky or background plates that are clearly not the project location (palm trees on a Boston streetscape, for example).
- Omitting a north-point or sun-angle annotation on shadow studies, which are often submitted alongside renders.
- Providing renders at screen resolution only, then needing to reorder print-quality files days before the hearing.
- Not version-controlling renders — submitting Revision A to the planning portal and Revision B to the board pack.
What Does It Cost to Produce Planning Renders?
Cost is driven by project complexity, not by a fixed menu. The main factors are: building type and scale (a single-family infill versus a ten-storey mixed-use tower require very different modeling effort), the number of views required, whether a photomontage composite is needed, material complexity (custom curtain-wall systems take longer to match than standard brick), and how complete the drawings are at briefing. For a detailed breakdown of what drives visualization costs, see our rendering cost guide.
Frequently Asked Questions
How many renders does a planning application typically need?
Most US planning and design-review submissions require three to five exterior views: a primary street-level view, a secondary angle, an aerial context view, and sometimes a rear or side elevation. Larger mixed-use projects often add a dusk view and a landscape render. Always check the specific jurisdiction's submission guidelines before briefing a studio.
Do planning renders need to show neighboring buildings?
Yes — for any submission where massing, scale, or neighborhood character is under review, neighboring structures are essential. A render that shows the proposed building in isolation gives reviewers no way to assess bulk or compatibility. Accurate neighboring context is one of the most important credibility signals in a planning render.
What is a photomontage and when is it required?
A photomontage composites a 3D render of the proposed building onto a real photograph of the site, camera-matched to the exact lens and position of the photo. It is the most accurate way to show visual impact and is commonly required for sensitive sites, heritage streetscapes, or projects where the planning authority wants to minimize interpretation. It requires a precise site survey to execute correctly.
Can renders be used for both planning approval and marketing?
Yes, but the briefs are different. Planning renders prioritize accuracy, context, and neutral presentation. Marketing renders prioritize aspiration, lighting drama, and lifestyle staging. The most efficient approach is to model the building once at planning stage and produce a second, more polished marketing pass from the same model once approval is secured — saving significant modeling cost on the second round.
How long does it take to produce planning-grade renders?
Timeline depends on model complexity and how complete the drawings are at briefing. Simple residential projects with complete drawings can turn around in five to ten business days. Complex commercial or mixed-use projects with photomontage requirements typically take two to four weeks. Providing complete, coordinated drawings and confirmed material specs at the start of the project is the single biggest lever on turnaround time.
Ready to brief your planning renders? Contact Ratio Visuals with your drawings and submission deadline — we'll confirm scope, views, and delivery specs before work begins.
Last updated: November 2026