The 3D Interior Rendering Process Explained: Moodboard to Final Image
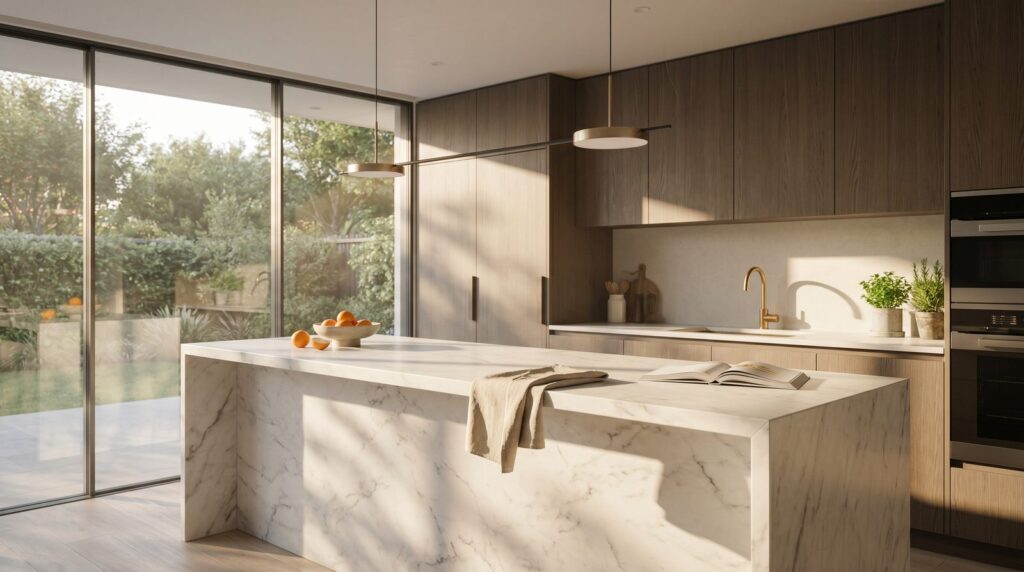
A studio turns a moodboard and floor plan into a photorealistic interior render through six sequential stages: client brief intake, 3D modelling from architectural drawings, PBR material and furniture assignment, lighting and camera setup, structured revision rounds, and final file delivery. Each stage has clear inputs and outputs. A straightforward single-room project typically moves from brief to approved image in one to two weeks; complex multi-room packages take two to four weeks.
What Do You Need to Provide Before Work Begins?
The project starts with what you hand the studio — and the quality of that handoff directly determines how fast the first draft lands. At minimum, a studio needs floor plans (PDF or CAD), a moodboard or design reference images, a finish schedule or material selections, and a clear list of which rooms and camera angles are required.
The more specific the brief, the less back-and-forth before modelling begins. Our project brief checklist walks through every asset category — drawings, FF&E specs, brand guidelines, and view priorities — so nothing gets assumed. If you are still in schematic design and finishes are undecided, tell the studio upfront; a skilled team can propose placeholder materials and flag them for revision rather than stalling the whole job.
- Floor plans / reflected ceiling plans — establishes room geometry, ceiling height, window and door placement
- Moodboard or design direction — communicates the aesthetic target (warm minimalist, coastal contemporary, etc.)
- Finish schedule — flooring species, tile patterns, paint colours, countertop materials
- FF&E references — specific furniture, fixture, and equipment items, or style references if items are not yet specified
- Camera angle preferences — hero shot, secondary views, or a simple description of what the image needs to communicate
- Deadline and revision budget — sets the production schedule from day one
How Does the Studio Build the 3D Model from Your Plans?
Modelling is where the floor plan becomes a three-dimensional space. The artist imports the architectural drawings as a base reference and constructs the room geometry — walls, ceiling, floor slab, window reveals, door casings, built-in joinery, and any architectural detailing called out in the drawings.
This stage is the most technically demanding part of the process. Ceiling coffers, crown moulding profiles, and millwork details all need to be modelled accurately because they define how light behaves later. A room with a simple flat ceiling and no built-ins might take a few hours to model; a hotel lobby with a coffered ceiling, custom bar, and decorative columns can take a full day or more.
Once the shell is complete, the artist populates the space with furniture. Studios maintain large libraries of 3D furniture assets — sofas, dining sets, beds, task chairs — and source additional pieces from vendors like Moooi, RH, or West Elm when a specific product needs to be matched exactly. Custom furniture that is not in any library gets modelled from scratch using manufacturer drawings or product photos.
How Are Finishes, Materials, and Furniture Selected?
Material assignment is where the render starts to look like a real space rather than a grey box. Every surface gets a PBR (physically based rendering) material — a shader that controls how light interacts with it based on real-world physical properties: base colour, roughness, metalness, reflectivity, and surface normal detail.
For a hardwood floor, that means a wood-grain texture map, a roughness map that simulates the sheen of the finish, and a normal map that gives the planks micro-surface depth. For a honed marble countertop, roughness values are dialled up and reflectivity down, producing the soft, non-specular look of a matte stone. These distinctions matter enormously — the wrong roughness value on a tile makes it look plastic rather than ceramic.
When specific products are specified, the studio sources or creates textures that match the actual manufacturer’s material. When finishes are still open, the team proposes options that fit the moodboard and flags them clearly in the draft so you can approve or swap before final rendering begins. See our guide on how to show finishes that close sales for a deeper look at material presentation strategy.
Common material types and what drives their complexity
| Material Type | Key PBR Properties | Complexity Driver |
|---|---|---|
| Hardwood flooring | Grain texture, gloss level, plank scale | Custom species matching |
| Polished / honed stone | Reflectivity, roughness, vein pattern | Book-matched slab layouts |
| Upholstered fabric | Weave normal map, subsurface softness | Specific manufacturer textile |
| Painted drywall | Slight roughness, colour accuracy | Low — fast to assign |
| Metal (brushed, polished) | Metalness, anisotropic reflection | Finish direction (grain angle) |
| Glass (clear, frosted, tinted) | Transmission, IOR, roughness | Layered glazing or patterned glass |
What Happens During the Lighting and Camera Setup Stage?
Lighting is the single biggest variable separating a photorealistic interior render from a flat, unconvincing one. The studio sets up a physically accurate lighting rig using a combination of HDRI environment light (for natural daylight or dusk exterior contribution through windows), IES-profiled artificial lights (recessed cans, pendants, sconces, under-cabinet strips), and emissive materials where needed.
Camera placement is chosen to communicate the room’s strongest selling point — usually a hero angle that shows the full depth of the space, the feature wall, and the primary light source in one frame. Focal length, sensor size, and depth of field are all set to mimic a real architectural photography lens (typically a 24mm–35mm equivalent), keeping the perspective natural rather than distorted.
In our interior work, we consistently find that the interplay between natural window light and warm artificial sources — especially at a late-afternoon time-of-day — produces the most emotionally resonant images for residential marketing. That balance takes iteration: the first lighting pass is rarely the final one, which is why revision rounds exist.
For a detailed walkthrough of how lighting choices affect the final output, see our rendering process guide.
How Many Revision Rounds Should You Expect?
Most professional studios structure interior rendering projects around two formal revision rounds after the first draft, with a third available for complex or high-stakes projects. That structure exists for a reason: feedback compounds. Changes to camera angle can expose material issues; material swaps can reveal lighting imbalances.
Round one feedback typically addresses composition, furniture layout, and any materials that are clearly wrong. Round two refines lighting mood, colour accuracy, and fine detail. By round three, most projects are at approval stage. Scope creep — adding rooms or views mid-project, or changing the design direction entirely — falls outside the revision structure and is treated as a change order.
To get the most out of each round, consolidate all feedback from every stakeholder before submitting it. Fragmented feedback from multiple reviewers sent in separate emails is the most common cause of revision overruns on interior projects.
What Does a Final Deliverable Package Include?
A finished interior rendering project is not just a JPEG. The standard deliverable package from a professional studio includes high-resolution image files (typically 4000–6000 pixels on the long edge at 300 dpi), print-ready and web-optimised versions, and the agreed number of approved views. Some studios also include the native scene file or layered PSD if that is part of the scope.
For real-estate marketing purposes, you should also confirm whether the studio delivers with and without furniture (empty-room variants), day and dusk versions of the same view, or white-label files for your marketing team to retouch. These extras are worth specifying upfront rather than requesting them after final approval, when the scene may have been archived.
Our interior rendering service includes a defined deliverable spec for every project so there are no surprises at handoff.
How Long Does the Full Process Take from Brief to Final Image?
Timeline depends on three variables: room count and complexity, how complete the brief is at kickoff, and how quickly feedback is returned during revision rounds. A single residential room with a clear brief and fast client feedback can move from intake to final approval in five to seven business days. A multi-room hospitality suite or model-unit package with custom furniture and multiple lighting scenarios typically takes three to four weeks.
| Stage | Typical Duration | What Can Slow It Down |
|---|---|---|
| Brief intake & kickoff | 1–2 days | Incomplete drawings or missing finish schedule |
| 3D modelling | 1–3 days | Complex millwork, custom furniture modelling |
| Material & furniture assignment | 1–2 days | Unspecified finishes requiring proposal rounds |
| Lighting & camera setup | 0.5–1 day | Multiple time-of-day variants |
| First draft render & delivery | 1 day | High scene complexity, large image resolution |
| Revision rounds (×2) | 2–4 days | Slow stakeholder feedback, fragmented notes |
| Final delivery | 0.5 day | Additional file format requests |
The single most controllable factor on your side is feedback turnaround. Studios can hold a production slot open for one to two days; beyond that, the project re-queues behind incoming work.
Frequently Asked Questions
Do I need a completed design before starting an interior render?
No — many developers begin rendering during schematic or design development. The studio can work with preliminary floor plans and a moodboard, use placeholder finishes, and update materials as the design is resolved. Flagging what is confirmed versus tentative at kickoff keeps revision rounds focused and avoids rework.
What file formats are typically delivered for interior renders?
Most studios deliver high-resolution JPEG or TIFF files at 300 dpi for print and compressed JPEGs or PNGs for digital use. Layered PSD files, raw render passes, or native 3D scene files can usually be included in scope if requested upfront. Confirm the deliverable spec before the project starts, not after final approval.
Can the studio match a specific furniture product or material exactly?
Yes, for most specified products. Studios source manufacturer 3D models, use product photography to build custom textures, or model the item from scratch using spec sheets. Exact material matching — a specific tile colourway, a named fabric from a textile brand — is standard practice for high-end residential and hospitality projects.
How does interior rendering cost compare across project types?
Cost is driven by room count, design complexity, number of camera views, custom furniture modelling requirements, and how many lighting scenarios are needed. A single straightforward room costs significantly less than a full model-unit package with multiple rooms and day/dusk variants. See our rendering cost guide for a full breakdown of the drivers.
What is the difference between a draft render and a final render?
A draft render is produced at lower resolution and reduced render quality — enough to evaluate composition, materials, and lighting direction without the full compute time. A final render runs at full resolution with maximum sampling, producing the clean, noise-free image used for marketing. Drafts are for feedback; finals are for publication.
Ready to start your next interior project? Send us your brief and we will confirm scope, timeline, and deliverables before work begins.
Last updated: July 2026