How to Brief a 3D Exterior Rendering
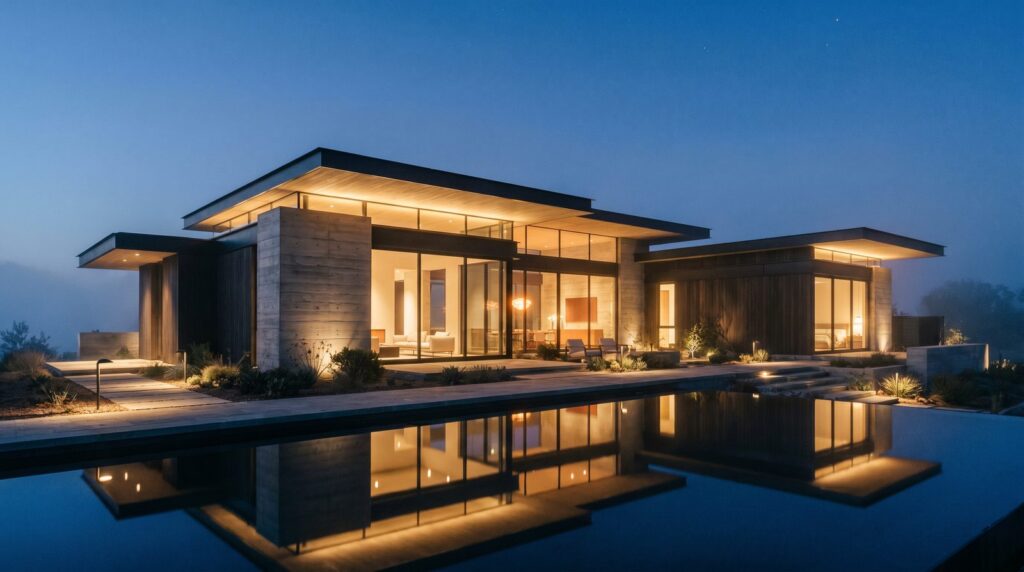
To get an accurate exterior 3D render on the first pass, send your studio: architectural drawings (site plan, elevations, floor plans in PDF or CAD), a materials schedule with manufacturer references or physical samples, at least two specified camera positions, a lighting brief (day, dusk, or night), and site-context details such as neighboring structures and landscaping intent. The more complete that package, the fewer revision rounds you’ll need.
What Files and Drawings Does a Rendering Studio Actually Need?
Your studio needs enough geometric information to build an accurate 3D model — nothing more, nothing less. At minimum, that means:
- Site plan — shows building footprint, orientation, and relationship to street and neighboring structures.
- All exterior elevations — north, south, east, and west faces, dimensioned. These drive every facade detail.
- Floor plans — confirm window and door placement that must align with the elevations.
- Roof plan or section — critical for pitched roofs, parapets, overhangs, and rooftop equipment.
- 3D model (if available) — Revit, SketchUp, or Rhino files dramatically reduce modeling time and improve accuracy.
- Specification sheets — for any architectural feature that isn’t obvious from drawings (canopies, cladding profiles, custom glazing systems).
Send files in their native format where possible. A low-resolution PDF of an elevation is workable; a scanned sketch of a sketch is not. In our exterior work across residential towers, commercial buildings, and townhouse communities, the single biggest source of first-round revisions is an elevation set that contradicts the floor plan — reconcile those before submitting.
If your design is still in early concept phase, that’s fine — just flag it. We can produce a concept-stage exterior render with placeholder details, then update when drawings are resolved.
How Do You Communicate Exterior Materials and Finishes?
Describe every visible exterior surface with a manufacturer name, product line, and colorway — or attach a physical sample reference. Vague descriptions like “light grey stucco” produce guesswork; “Sherwin-Williams Repose Gray SW 7015 smooth stucco finish” produces accuracy.
For each material zone on the facade, your brief should specify:
- Material type — stucco, brick, fiber cement panel, ACM, glass, concrete, wood cladding, stone veneer, etc.
- Brand and product reference — manufacturer catalog number or finish name where possible.
- Color — paint code (Benjamin Moore, Sherwin-Williams, RAL) or physical chip scan.
- Texture and sheen — smooth vs. sand finish, matte vs. satin vs. high-gloss, brushed vs. polished metal.
- Scale and pattern — brick bond pattern, panel module size, tile grout width.
- Application zone — mark which material goes where on a labeled elevation or annotated photo.
Reference images are extremely useful. Pull three to five photos — from Houzz, manufacturer websites, or your own project files — that show the material in a built context. That visual reference communicates surface behavior (how light catches it, how it weathers) far better than a written description alone. For a deeper look at how we map materials to surfaces, see our guide on exterior rendering specifications for materials, lighting, and camera angles.
Which Camera Angles and Views Should You Specify Upfront?
Define your camera positions before work starts — repositioning cameras mid-production wastes time on both sides. For most exterior projects, two to four views cover the full marketing need.
For each view, specify:
| Parameter | What to Provide | Why It Matters |
|---|---|---|
| Vantage point | Street-level, elevated, aerial, corner oblique | Sets scene composition and which facades are visible |
| Focal building face | “Primary south-facing entry elevation” | Ensures the hero facade is centered |
| Camera height | Eye-level (5–6 ft), podium level, drone height | Affects perceived scale and drama |
| Lens / field of view | Wide (24 mm), standard (35–50 mm), telephoto (85 mm) | Controls perspective distortion and depth compression |
| Reference image | A photo or sketch showing the desired framing | Fastest way to align expectations |
Common view packages: a front-entry hero shot, a corner view showing two facades, a rear or amenity-deck view, and an aerial context view. If you’re unsure which angles serve your marketing best, ask your studio to propose a view set based on the site plan — that’s a normal part of the kickoff conversation.
How Do You Brief Lighting Conditions — Day, Dusk, or Night?
Lighting condition is one of the highest-impact decisions in an exterior render, and it must be specified per view — not per project. A single building often warrants a daytime hero shot and a dusk amenity view in the same deliverable package.
For each view, specify:
- Time of day — midday sun, late-afternoon golden hour, blue-hour dusk, or full night.
- Season and sun angle — summer sun sits high; winter sun rakes low and casts long shadows. Specify if shadow behavior matters for your site.
- Sky condition — clear blue sky, partly cloudy, overcast (diffuse, soft shadows), dramatic storm light.
- Artificial lighting intent — for dusk and night shots, list which fixtures are lit: facade uplights, entry canopy, landscape path lights, pool, signage.
- Mood reference — pull two or three reference images that capture the atmosphere you want. “Warm and welcoming” means different things to different people; a reference image is unambiguous.
In our dusk exterior work, the blue-hour window — roughly 20 minutes after sunset — is the most requested condition for luxury residential and hospitality projects because it balances ambient sky light with warm interior glow. If you want that look, say so explicitly and confirm which interior spaces will be lit. Our full breakdown of lighting options is in choosing render lighting: day, dusk, or night.
What Context and Site Information Should You Include?
An exterior render doesn’t exist in a vacuum — the surrounding environment anchors the building in reality and communicates neighborhood character to buyers and investors. Include:
- Site survey or topographic plan — grade changes, retaining walls, and slope affect how the building sits in the scene.
- Neighboring structures — height, massing, and setback of adjacent buildings. Even rough massing blocks help.
- Landscape design intent — planting plan or species list if available; if not, specify the general character (lush tropical, minimal desert, manicured suburban).
- Hardscape and site features — driveway material, parking layout, pool or water feature, fencing, signage.
- Street scene — should the render show passing cars, pedestrians, street trees, sidewalk? Or a clean, minimal foreground?
- Geographic location — city and climate zone inform vegetation, sky color, and ambient light quality. A Tampa coastal project looks different from a Denver mountain site.
For development projects targeting pre-sales or investor presentations, site context is especially important — it demonstrates the neighborhood quality and proximity to amenities. See how we approach this in our exterior rendering services.
What Happens If Your Brief Is Incomplete — and How to Avoid Revisions?
An incomplete brief doesn’t stop production — it just shifts decision-making to the studio, and studios will make reasonable assumptions that may not match your vision. The most common assumption-driven revision requests we see:
- Wrong material color or finish (brief said “grey metal panel,” studio chose the wrong shade)
- Camera angle doesn’t show the feature the client cared most about
- Landscaping is too lush or too sparse for the project’s market positioning
- Lighting mood is technically correct but doesn’t match the brand feel
- Window mullion pattern doesn’t match the actual glazing specification
The fix is straightforward: front-load the information. A 30-minute kickoff call where you walk through the brief with your studio eliminates most of these issues before modeling begins. Studios can also issue a brief-review checklist after intake — ask for one if it isn’t offered automatically.
Revision rounds cost time, not just money. On a pre-sales timeline, a two-week delay waiting for revision approvals can push a launch date. The ROI of a thorough brief is measured in days recovered, not just render quality.
What Does a Complete Exterior Rendering Brief Look Like? (Checklist)
Use this checklist before submitting any exterior rendering brief. A complete brief covers all items in each category.
| Category | Required Items |
|---|---|
| Drawings & Files | Site plan, all exterior elevations (dimensioned), floor plans, roof plan, 3D model if available, spec sheets for custom elements |
| Materials | Material type, manufacturer + product reference, color code, texture/sheen, scale/pattern, annotated zone map per elevation |
| Camera Views | Number of views, vantage point per view, focal facade, camera height, lens preference, reference image per view |
| Lighting | Time of day per view, season/sun angle, sky condition, artificial lighting list (dusk/night), mood reference images |
| Site Context | Survey/topo, neighboring massing, landscape intent, hardscape details, street scene preference, geographic location |
| Project Details | Project name, building type, target audience (buyers, investors, planning board), intended use (brochure, website, social, permit), delivery deadline |
| Brand & Style | 3–5 reference renders or photos that capture the desired aesthetic, any brand color or style guidelines |
For a downloadable version of this checklist, see our 3D rendering project brief checklist.
When your brief is complete, the first-pass render should be close enough to approve with minor refinements — not a starting point for a material overhaul. That’s the standard we hold ourselves to, and a thorough brief is what makes it achievable. If you’re ready to start a project, contact Ratio Visuals and we’ll walk through your brief together before any work begins.
Frequently Asked Questions
Can I submit a brief if my design isn’t finalized yet?
Yes. Many exterior rendering projects begin at schematic design stage. Flag which elements are still in flux and the studio will model confirmed elements first, leaving placeholder details to be updated. Just be clear about what is locked and what may change — that prevents rework on finalized geometry.
How many reference images should I include in my brief?
Three to five reference images per category — materials, camera angle, and lighting mood — is the right range. More than ten becomes noise. Choose images that show the specific quality you want: surface texture, light behavior, or compositional framing. Label each reference so the studio knows what aspect it illustrates.
What if I don’t know which camera angles to choose?
Share your site plan and tell the studio what the render is for — pre-sales brochure, investor deck, planning submission, or social media. An experienced studio will propose a view set based on the building’s strongest facade, entry sequence, and marketing context. Camera selection is a collaborative step, not a solo decision.
Do I need a 3D model to get started, or are drawings enough?
Drawings are enough. A full set of dimensioned elevations, a site plan, and floor plans gives a studio everything needed to build an accurate model from scratch. If you have a Revit or SketchUp model, sharing it reduces modeling time and improves geometric precision — but it’s an accelerant, not a requirement.
How does geographic location affect an exterior render?
Location determines sun angle, ambient light quality, sky color, and appropriate vegetation. A Florida coastal project has a high, bright sun, lush tropical planting, and a warm atmospheric haze. A Pacific Northwest project has softer diffuse light and evergreen landscaping. Specifying city and climate zone lets the studio dial in those environmental details accurately.
Last updated: August 2026