Exterior Rendering Specs: Materials, Lighting & Camera Angles
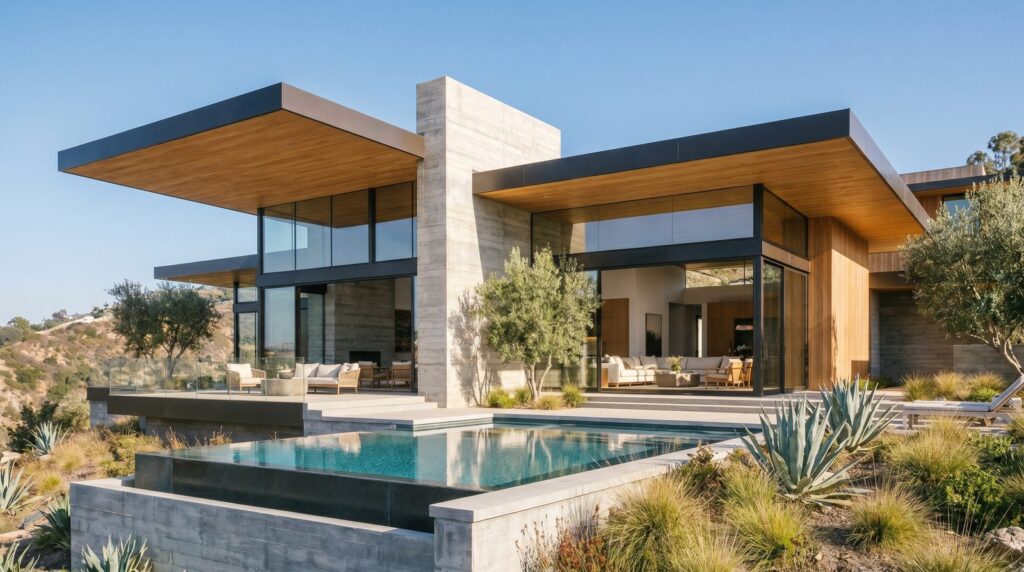
When ordering a 3D exterior rendering, specify your cladding materials and finishes with reference images or product names, choose a lighting condition (day, dusk, or night) that matches your marketing goal, and identify two to four camera angles that show the building’s strongest elevations and site relationship. Locking these decisions down before modeling starts eliminates costly revision cycles and produces a final image your team can actually use.
Why Specifications Matter Before Your Studio Starts Modeling
Every hour a studio spends modeling the wrong material or re-lighting a scene that wasn’t specified is an hour billed against your budget and timeline. In our exterior work across residential towers, mixed-use blocks, and single-family developments, the projects that move fastest share one trait: the client arrives with clear material, lighting, and camera decisions already made — or at least a short list of options to choose from.
Ambiguity at the briefing stage compounds. A vague “modern look” instruction forces the studio to guess on facade cladding, glazing tint, trim color, and landscaping density. Each guess is a potential revision. Specifications aren’t a creative constraint — they’re the foundation that lets the studio focus entirely on photorealism and quality rather than interpretation.
If you’re new to the briefing process, our guide on how to brief a 3D exterior rendering covers what files to send and how to structure your submission. This article goes deeper on the creative specification decisions themselves.
How to Choose Exterior Materials and Finishes for Your Render
Specify materials at the product or finish level, not the category level. “Brick” is a category; “tumbled buff brick with a raked mortar joint” is a specification. The difference in the final image is significant, and it’s the difference between a render that reads as your building versus a generic stand-in.
Primary cladding
Identify your primary facade material — fiber cement panel, stucco, brick, stone veneer, metal panel, or glass curtain wall — and supply a manufacturer reference, a finish swatch, or a high-resolution reference photo. PBR (physically based rendering) materials require accurate base color, roughness, and reflectivity data. A product spec sheet or a photo of an installed sample gives the studio what it needs to build a faithful material.
Secondary materials and accents
List trim, window frame color, soffit material, balcony railing type (glass, cable, painted steel), and any feature wall treatments separately. These are often the details that make a render look designed rather than generic. If your window frames are dark bronze aluminum, say so — don’t leave it to a default grey.
Glazing
Glazing tint and reflectivity have an outsized impact on exterior renders, especially for towers and commercial buildings. Specify whether your glass is clear, low-e grey, blue-green, or bronze-tinted, and whether it’s highly reflective or more transparent. This single decision changes how the building reads in every lighting condition.
Hardscape and ground plane
Specify driveway, walkway, and plaza surface materials — concrete pavers, asphalt, poured concrete, decomposed granite — and any surface pattern or scoring. The ground plane occupies a large portion of most exterior renders and its material quality anchors the photorealism of the whole image.
| Material Category | What to Specify | Why It Matters in the Render |
|---|---|---|
| Primary cladding | Product name, finish, color code | Drives 60–70% of the facade’s visual character |
| Glazing | Tint, reflectivity, frame color | Changes building legibility across all lighting conditions |
| Trim & accents | Material type, RAL/paint code | Separates a designed look from a generic one |
| Railings | Glass, cable, steel — finish and color | Affects balcony transparency and perceived openness |
| Hardscape | Paver type, pattern, color | Grounds the building; anchors photorealism |
| Roofing | Material, color, profile (flat, pitched, metal) | Critical for aerial and elevated camera angles |
Day, Dusk, or Night: Picking the Right Lighting Condition
The lighting condition is the single biggest creative decision in an exterior render, and the right choice depends entirely on what the image needs to do. Each condition tells a different story and serves different marketing contexts.
Our dedicated guide on choosing render lighting — day, dusk, or night covers this in full detail, but here’s the practical framework:
Daytime renders
Daytime renders show materials, massing, and site context with maximum clarity. They work best for permit submissions, planning applications, investor decks where legibility matters more than atmosphere, and projects where the architecture itself is the hero. Specify time of day (morning, midday, or afternoon) because sun angle affects shadow depth and which elevations are lit. A southwest-facing facade photographed at 3pm reads very differently from the same facade at 10am.
Dusk renders
Dusk — the 20-minute window after sunset — is the most requested lighting condition in residential and hospitality marketing for good reason. Interior lights glow, the sky carries color, and the building reads as warm and inhabited. Dusk renders are particularly effective for luxury residential, multifamily lease-up campaigns, and hotel or resort projects. If your project has a pool, outdoor lighting, or feature landscaping, dusk shows all of it simultaneously.
Night renders
Night renders are high-drama and best used selectively — for retail and commercial projects where signage and facade lighting are part of the brand, for hospitality where the lit interior is the product, or as a second hero image alongside a daytime shot. They require a fully specified exterior lighting plan; without it, the studio has to invent fixture locations and intensities, which may not match what gets built.
Overcast and golden-hour variants
Overcast lighting is flat and even — useful for showing material color accurately without strong shadow bias. Golden-hour (just after sunrise or before sunset) produces long, warm shadows and is popular for suburban residential and coastal projects. Both are valid choices; specify them explicitly rather than leaving “mood” open-ended.
Which Camera Angles Show Your Building at Its Best?
Most exterior rendering packages include two to four camera angles. Choosing them strategically — rather than defaulting to “front elevation” — is what separates a render set that markets the project from one that merely documents it.
The hero angle
Every project has one angle that shows the building at its most compelling: usually a 45-degree corner view that captures two elevations, shows depth and massing, and includes the primary entry or the strongest architectural feature. This is your hero. It should be chosen first and drive the lighting and landscaping decisions for the rest of the set.
Street-level pedestrian view
A camera set at 5–6 feet above grade, positioned at the sidewalk or approach path, shows how the building will actually be experienced by residents, customers, or visitors. This angle humanizes the scale and is essential for multifamily, retail, and mixed-use projects where the street relationship matters.
Elevated or aerial perspective
For larger sites, a slightly elevated camera (15–30 feet) or a true aerial view shows site layout, parking, landscaping, and the building’s relationship to adjacent structures. This angle is critical for masterplan renders and investor presentations. See our exterior rendering services page for examples of how aerial perspective integrates with site context.
Detail or entry close-up
A tighter shot of the entry canopy, lobby facade, or a signature architectural detail gives the render set range and provides assets for social media, brochure covers, and signage. Specify which detail matters most — don’t leave it to the studio to guess.
Camera height and lens guidance
A wide-angle lens (24–35mm equivalent) exaggerates depth and makes buildings feel larger; a longer focal length (50–85mm) compresses space and reads as more photographic and natural. For most marketing renders, 35–50mm is the sweet spot. Specify if you have a preference; if you don’t, tell the studio the intended use (billboard, web, brochure) and let them optimize.
How Context and Landscaping Affect the Final Image
Context — the surrounding buildings, street furniture, vehicles, and sky — determines whether a render reads as a real place or a building floating in a vacuum. Landscaping density, species selection, and maturity level all shift the perceived quality and warmth of the image.
Specify whether the surrounding context should be included (and how much), whether it should be accurate to the actual site or idealized, and what season the landscaping should represent. A Florida coastal project looks very different with mature palms and tropical groundcover than with generic temperate-climate trees. In our exterior work for Tampa-area developers, specifying regionally appropriate species — sabal palms, sea grapes, bougainvillea — immediately makes the render feel site-specific rather than templated.
For projects with significant outdoor amenities, our exterior rendering and landscape visualization work together — specify whether pool decks, fire pits, outdoor seating, or amenity areas should be populated with people and furniture, and at what density.
What File Formats and Resolutions Should You Request?
Request deliverables in formats that match your actual end uses — not just “high resolution.” A file optimized for a billboard is different from one sized for a website hero or an investor deck.
- Print and large-format: TIFF or PNG at 300 DPI at final output size. For a 24×36-inch poster, that’s a very large file — confirm the studio can deliver it before the project starts.
- Web and digital marketing: JPEG at 72–150 DPI, sized to your largest display breakpoint (typically 2560px wide for full-bleed web headers). Request a web-optimized version separately from the print master.
- Investor decks and PDFs: PNG or high-quality JPEG at 150 DPI is usually sufficient and keeps file sizes manageable.
- Social media: Cropped and sized versions at platform-specific ratios (1:1 for Instagram grid, 4:5 for Instagram portrait, 16:9 for LinkedIn). Request these as a separate crop package.
- Raw render layers: If you anticipate needing future compositing or edits (adding signage, swapping sky, changing landscaping), request layered PSD or EXR files with separate passes. This costs more up front but saves significant time later.
A Pre-Brief Checklist: What to Lock Down Before You Submit
Use this checklist before submitting your brief. Every item you resolve in advance is a revision you won’t need to pay for later. For the full project-brief framework, see our 3D rendering project brief checklist.
- ☐ Primary cladding material — product name or reference image
- ☐ Secondary materials, trim, and accent colors (RAL or paint code where possible)
- ☐ Glazing tint and reflectivity level
- ☐ Railing type and finish
- ☐ Hardscape surface and pattern
- ☐ Lighting condition — day (time of day), dusk, night, or overcast
- ☐ Exterior lighting plan (if night render is included)
- ☐ Number of camera angles and priority ranking
- ☐ Hero angle identified (elevation, height, lens preference)
- ☐ Context level — accurate site surroundings or idealized
- ☐ Landscaping — species, season, maturity level
- ☐ People and vehicles — yes/no, density
- ☐ Deliverable formats and resolutions for each end use
- ☐ Layered files needed — yes/no
Frequently Asked Questions
How many camera angles should I order for a standard exterior rendering project?
Most exterior rendering projects include two to four camera angles. Two angles — a hero corner view and a street-level pedestrian shot — cover the majority of marketing needs. Add a third for aerial context or a detail close-up if the project has a strong architectural feature or a significant amenity area worth showcasing separately.
Do I need to specify materials if my architect’s drawings already show them?
Drawings specify materials in notation, but a rendering studio needs visual references to build accurate PBR textures. Supplement your drawings with manufacturer product pages, finish swatches, or high-resolution reference photos of installed examples. The more visual the reference, the more accurate the final material in the render.
Is dusk always better than daytime for marketing renders?
Not always. Dusk excels for residential, hospitality, and amenity-driven projects where warmth and atmosphere matter. Daytime renders are better for planning submissions, commercial projects where facade legibility is primary, and investor decks where clarity outweighs mood. Many projects benefit from one of each — a daytime hero for technical presentations and a dusk version for consumer marketing.
What happens if I don’t specify the lighting condition?
The studio will make a reasonable default choice — usually midday or afternoon daytime — but it may not be the condition that best serves your marketing goals or shows the building’s strongest features. Specifying lighting takes five minutes and is one of the highest-leverage decisions you make in the entire briefing process.
Can I change materials or camera angles after modeling starts?
Material changes after modeling is complete are usually straightforward, though they add time. Camera angle changes after a scene is fully built can require significant re-work if they reveal unmodeled areas of the site. Lock camera angles before the studio begins modeling — it’s the specification that’s most expensive to change late in the process.
Ready to brief your next exterior rendering project? Visit our exterior rendering services page to see examples and start a conversation with the studio.
Last updated: August 2026