Exterior Render Camera Angles: Which Views Sell
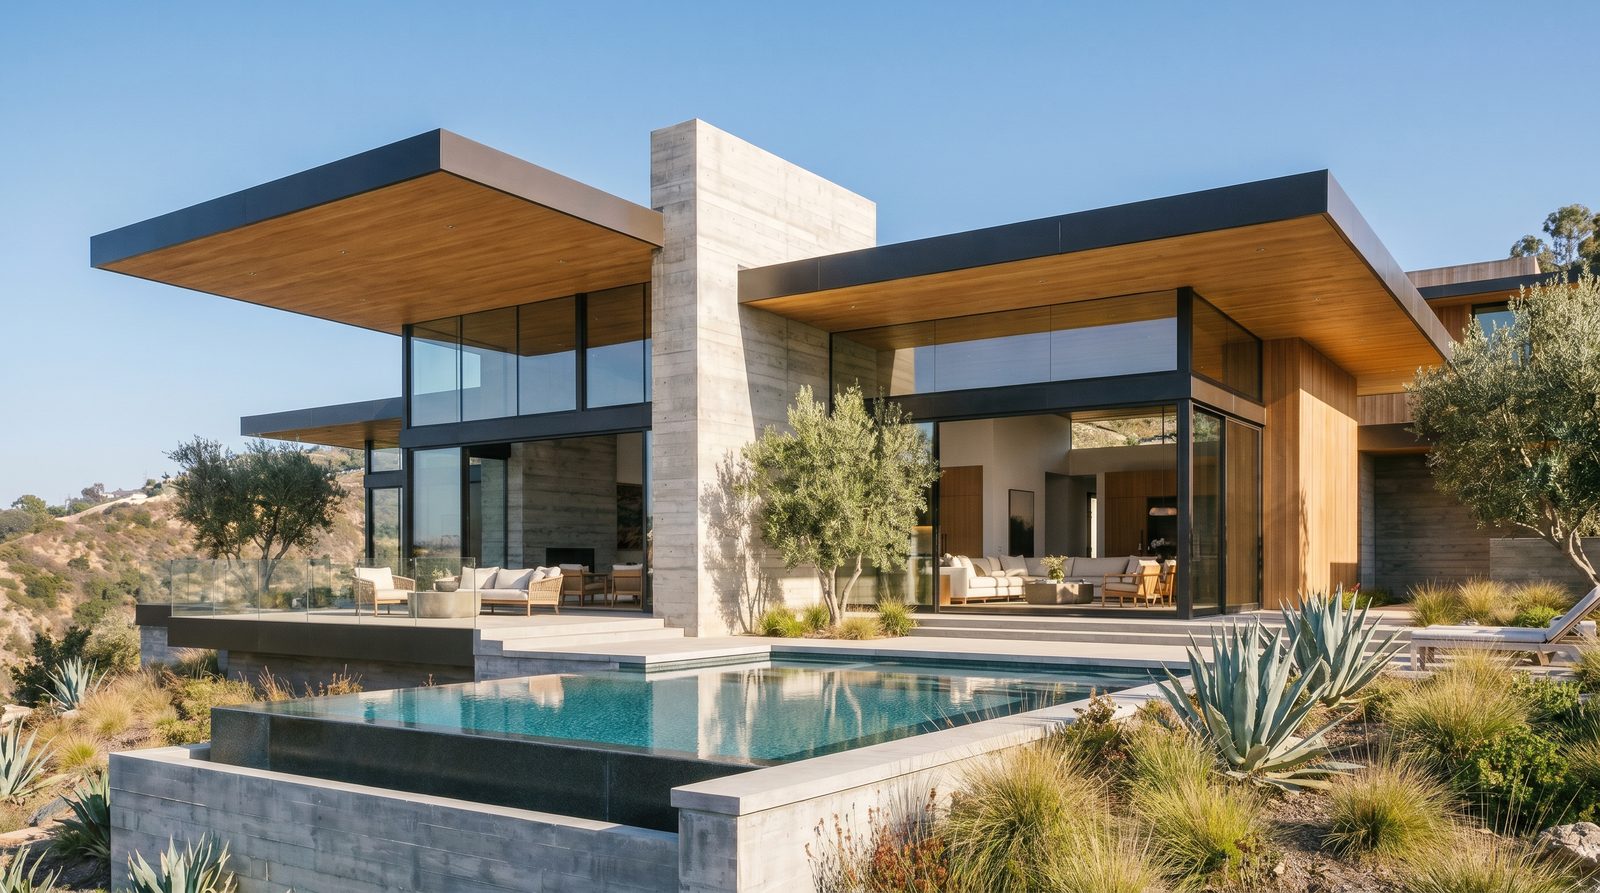
The four exterior render camera angles that consistently move real-estate projects are: the street-level hero (45° approach, eye-height), the corner perspective that reads two façades at once, the dusk or golden-hour aerial that establishes site context, and the pedestrian entry shot that puts a buyer at the front door. Get those four right and you have a complete marketing package. Every other angle is supplementary.
Why Camera Angle Is the Single Biggest Decision in an Exterior Render
Lighting, materials, and landscaping all matter — but camera placement determines what story the render tells. A poorly chosen angle can hide the best feature of a building or make a generous setback look cramped. In our exterior work at Ratio Visuals, we treat camera selection as a brief item, not an afterthought. We ask clients to confirm angles before any geometry is built, because changing a camera from 30° to 45° after modeling is trivial; repositioning it after lighting and vegetation passes have been finalized costs real time.
The angle also controls perceived scale. A low camera placed close to the building makes a two-story townhouse read like a four-story structure. A high, distant camera flattens a condo tower and makes it look squat. Neither is dishonest — both are choices — but they need to match the project's marketing goal.
The Four Angles That Appear in Almost Every Winning Package
1. The Street-Level Hero (45° Approach, Eye Height)
This is the primary deliverable for the vast majority of exterior projects. The camera sits at roughly 5–6 feet above grade — human eye height — and is placed at a 30° to 45° angle to the building's main façade. The result reads as "this is how you would see this building walking toward it," which is exactly the emotional anchor buyers and tenants need.
Key decisions at this angle: how much sky to show (more sky = more grandeur, less sky = more intimacy with the building), whether to include foreground elements like a parked car or pedestrian to establish scale, and how far back to place the camera. For single-family and townhouse projects, we typically keep the camera close enough that the building fills 60–70% of the frame. For condo towers and commercial buildings, pulling back reveals more of the podium and streetscape, which matters for urban-context approvals.
See how this angle performs across building types in our townhouse rendering guide and our exterior rendering services page.
2. The Corner Perspective (Two-Façade View)
Wherever a building has two distinct façades — a street front and a side elevation, or a primary and secondary entry — the corner perspective is the second essential shot. It solves a real problem: buyers and planning boards want to understand three-dimensional massing, and a single flat elevation does not convey that.
Camera height here is typically slightly higher than eye level — around 7–9 feet — to prevent the near corner from blocking the far façade. The camera is placed at roughly 45° to the corner itself, not to either face. This angle is especially valuable for mixed-use buildings, retail ground floors, and any project with meaningful architectural detail on two sides.
3. The Dusk or Golden-Hour Aerial
An aerial at dusk serves a different purpose from the street-level shots: it establishes the project in its site context and creates the aspirational, lifestyle-forward image that performs best in paid social and email campaigns. The camera is placed high enough to show surrounding streets, landscaping, and amenity areas, but not so high that the building becomes a speck.
For this angle, lighting is everything. A midday aerial can look sterile and technical. A dusk aerial — with interior lights glowing, pool water lit, and warm sky tones — reads as a place people actually want to live or work. Our exterior rendering specifications guide covers the lighting setups we use to achieve this in detail. For projects with significant outdoor amenities, pair the dusk aerial with a dedicated landscape and pool render at grade.
4. The Pedestrian Entry Shot
This angle places the camera at the front door or lobby entry, at true eye height, looking slightly upward toward the building's entry feature — canopy, portal, signage, or landscaped arrival sequence. It is the most emotionally direct angle in any package because it simulates the moment a buyer, tenant, or guest first arrives.
For hospitality and multifamily projects, this shot is often the one that ends up in the leasing office. For retail and restaurant projects, it doubles as the street-presence image that shows how the façade reads to passing foot traffic. Our work on retail and restaurant rendering consistently shows this angle generating the highest engagement in digital campaigns.
Supplementary Angles Worth Adding to a Package
Beyond the core four, several additional angles serve specific project types and marketing channels:
- Rooftop or amenity-deck view: Camera placed on the amenity level looking outward, capturing the view corridor. Essential for high-rise residential and hospitality projects where the view is a key selling point.
- Pool or courtyard view looking back at the building: Camera at water level or garden level, building in the background. This reverses the typical relationship and makes the outdoor space the hero — powerful for resort-style multifamily.
- Wide site aerial / masterplan view: Camera very high, nearly orthographic, showing the full site plan with context. Used for investor decks, planning submissions, and HOA presentations rather than consumer marketing.
- Night / artificial-light only: Camera at street level, all ambient light removed, building lit entirely by architectural lighting. Creates a dramatic image for commercial and hospitality projects where the night presence matters.
- Interior-to-exterior through glass: Camera inside a unit or lobby looking out through floor-to-ceiling glazing. Blends exterior context with interior quality — strong for luxury residential.
Camera Angle by Project Type: A Quick Reference
| Project Type | Primary Angle | Second Priority | High-Impact Add-On |
|---|---|---|---|
| Single-family / luxury home | Street-level hero (45°, eye height) | Pedestrian entry / arrival | Pool / outdoor living at dusk |
| Townhouse / row home | Street-level hero showing full row | Corner unit close-up | Aerial showing site layout |
| Midrise / condo | Street-level hero (pulled back) | Dusk aerial with context | Amenity deck / pool view |
| High-rise tower | Dusk aerial establishing height | Street-level hero at podium | Rooftop view corridor |
| Retail / mixed-use | Pedestrian entry / street presence | Corner two-façade view | Night artificial-light only |
| Hospitality / hotel | Pedestrian arrival / porte-cochère | Dusk aerial with landscaping | Pool / courtyard looking back |
| Office / commercial | Street-level hero (45°) | Corner two-façade view | Night exterior with lit lobby |
Technical Parameters That Define a Camera Angle
When briefing a render studio, "street-level hero" is a starting point, not a complete spec. The parameters that actually define the shot are:
- Camera height above grade: 5–6 ft for true eye level; 7–10 ft for a slightly elevated view that clears foreground obstructions; 15–30 ft for a low aerial.
- Focal length / field of view: 24–35mm equivalent for wide architectural shots; 50mm for a more natural, less distorted perspective; 85mm+ for compressed, detail-focused views. Wide angles exaggerate depth and make buildings look larger; longer focal lengths flatten perspective and emphasize façade detail.
- Camera-to-building distance: Determines how much context appears in frame. Closer = more building, less context; farther = more streetscape, smaller building.
- Tilt (pitch): Slight upward tilt (2–5°) adds grandeur. Keeping the camera perfectly level avoids converging verticals, which matters for planning documents. Downward tilt is rarely used in hero shots but works for aerial and amenity-deck views.
- Pan angle to façade: 0° = flat elevation (rarely used in marketing); 30° = dynamic but still shows mostly one face; 45° = the sweet spot for most exterior renders; 60°+ = strong corner emphasis.
Our exterior rendering specifications article goes deeper on focal length and lighting interaction. For projects with multiple building types across a site, our developer pre-sales playbook covers how to sequence angles across a full marketing campaign.
How Many Camera Angles Do You Actually Need?
For most residential projects going to market, three to four angles cover the full buyer journey: one hero for the listing and brochure cover, one context shot for the site plan page, one lifestyle angle for social, and one entry or detail shot for the leasing office or sales center. Adding more angles without a clear channel for each one produces diminishing returns.
For larger mixed-use, hospitality, or multi-building masterplan projects, six to ten angles is common — but each should have an assigned use before it is commissioned. The worst outcome is a package of eight renders where four are minor variations of the same view. See how hospitality developers typically structure their packages in our hotel rendering guide.
Cost is driven by the number of unique camera setups, the complexity of each scene (vegetation density, custom materials, animated elements), and the lighting passes required — not simply by the number of final images. Qualitatively, a dusk aerial with a full landscape scene takes significantly more time than a clean daytime street-level shot of the same building. For a breakdown of what drives render investment, visit our rendering cost guide.
Frequently Asked Questions
What is the best camera angle for an exterior rendering?
The street-level hero at 45° to the main façade, placed at human eye height (5–6 ft above grade), is the single most effective angle for most exterior renders. It replicates how a buyer or tenant would actually see the building on approach, making it the strongest image for listings, brochures, and sales-center displays.
How high should the camera be in an exterior architectural render?
Eye-height renders use 5–6 feet above grade. Slightly elevated views — useful for clearing foreground landscaping or showing a podium — sit at 7–10 feet. Low aerials start around 15–30 feet. True aerial context shots range from 50 feet to several hundred feet depending on site size. Each height tells a different story about the building.
What focal length is best for exterior architectural renders?
A 28–35mm equivalent focal length is the standard for exterior hero shots — wide enough to capture the full building with context, without the distortion of an ultra-wide. A 50mm lens produces a more natural, undistorted perspective and works well for entry and detail shots. Longer focal lengths (85mm+) are used when you want to compress depth and emphasize façade materiality.
How many camera angles should a developer commission for a marketing package?
Three to four angles cover most residential marketing packages: a hero shot, a context or aerial view, a lifestyle or amenity angle, and an entry shot. Larger mixed-use or hospitality projects typically need six to ten, but each angle should be tied to a specific marketing channel or deliverable before it is commissioned.
Does camera angle affect how realistic an exterior render looks?
Yes, significantly. A camera placed too close with a very wide focal length produces obvious distortion that reads as "computer generated." A camera at true eye height with a 28–35mm lens, combined with accurate foreground scale elements like a parked car or pedestrian, is what makes a render feel photographic rather than illustrative. Angle and lens choice are as important as material quality.
Ready to plan the camera angles for your next project? Visit our exterior rendering services page to see how we structure angle packages for developers and architects, or get in touch to discuss your specific project.
Last updated: November 2026