Renders for Architect Client Presentations: What Works
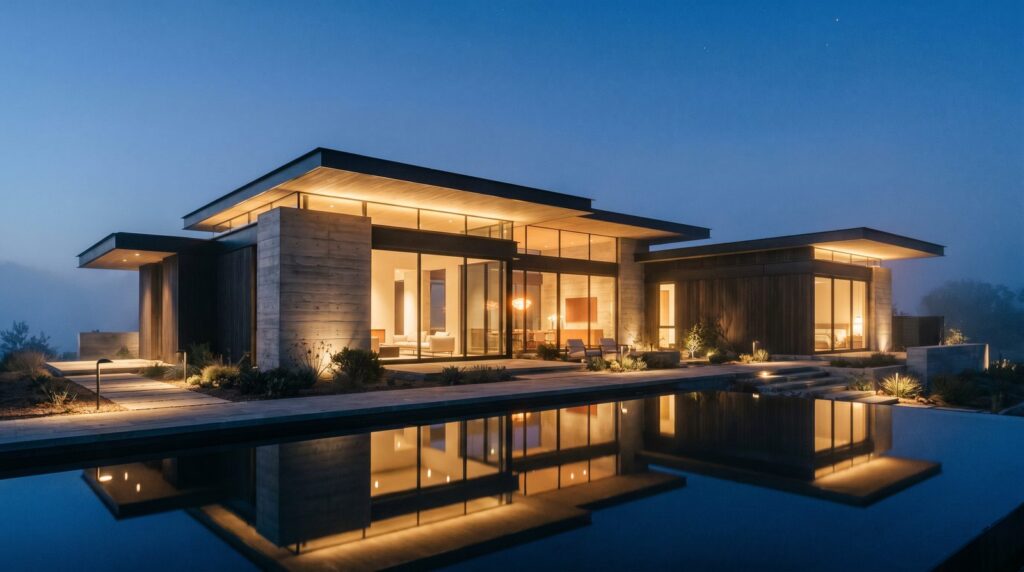
The 3D render types architects need most in client presentations are photorealistic exterior hero shots, key interior room views, and at least one aerial or site-context image — typically four to eight images total, sequenced by design story rather than by discipline. That combination gives clients a spatial understanding of the project without overwhelming them, and it consistently shortens approval timelines in our studio’s experience working with US architects and developers.
Why Do Client Presentations Fail Without 3D Renders?
Presentations fail when clients cannot picture the finished building. Flat drawings, floor plans, and section cuts communicate accurately to trained architects — but most clients, from homeowners to commercial investors, lack the spatial literacy to translate those abstractions into an emotional response. No emotional response means no approval.
In our exterior work with architects across residential, multifamily, and commercial projects, the single most common piece of feedback we hear after a first presentation is: “The client just couldn’t see it.” A well-placed photorealistic render removes that gap entirely. The client stops asking “what will it look like?” and starts asking “can we start sooner?”
Renders also protect the architect. When a client approves a design based on a render, scope-creep requests that contradict the approved imagery are much easier to manage. The render becomes a contractual reference point, not just a sales tool.
Which Render Types Work Best at Each Design Stage?
Different render types serve different approval gates — matching the deliverable to the stage prevents over-spending early and under-delivering late.
| Design Stage | Best Render Type | Primary Purpose |
|---|---|---|
| Concept / Schematic | Massing exterior, single hero angle | Validate massing, scale, and site fit |
| Design Development | Exterior hero + 2–3 interior key rooms | Confirm material palette, spatial feel |
| Pre-Construction / Permit | Full presentation package (6–8 views) | Final client sign-off, lender/board approval |
| Marketing / Pre-Sales | Photorealistic hero, lifestyle interiors, aerial | Drive reservations, investor confidence |
For schematic-stage presentations, a single polished exterior hero render is often enough to hold the room. Trying to present a full interior suite before the massing is approved wastes budget and confuses the conversation. Our rendering process guide walks through exactly how to phase deliverables so each round of images lands at the right moment.
How Many Views Should You Include in a Client Deck?
For most architect client presentations, four to eight renders hit the sweet spot — enough to tell a complete spatial story without diluting impact. More than ten images in a single deck tends to cause decision fatigue; fewer than four leaves clients with unanswered spatial questions.
A reliable four-view package for a residential or small commercial project looks like this:
- Hero exterior (day or dusk): The establishing shot. Sets tone, scale, and materials at a glance.
- Secondary exterior or entry view: Shows the approach or a key façade detail the hero angle misses.
- Primary interior room: Living room, lobby, or the room most central to the design concept.
- Aerial or site-context view: Places the building in its neighborhood — critical for urban infill, coastal, or hillside sites.
For larger multifamily or commercial projects, expand to six to eight views by adding a secondary interior (bedroom, amenity space, or office floor), a dusk or twilight exterior, and a landscape or pool view where outdoor living is a selling point. See our exterior rendering specifications guide for how camera angle selection affects which views belong in a deck.
What Level of Detail Do Clients Actually Need to Say Yes?
Clients say yes when the render is photorealistic enough to feel real, but not so hyper-detailed that it looks like a photograph of a different building. The goal is confident believability, not pixel-perfect deception.
Practically, that means:
- Materials must be accurate. If the spec says board-formed concrete and aluminum-clad windows, those must read clearly — not as generic grey surfaces. PBR (physically based rendering) materials with correct reflectance and texture scale are the baseline.
- Lighting must be contextual. Dusk lighting consistently outperforms flat midday renders in client presentations because it creates warmth and drama without feeling artificial. For interiors, natural light from the correct compass orientation matters — clients notice when sunlight comes from the wrong direction.
- Landscaping should be plausible, not perfect. Overly manicured CGI landscaping signals “fake” to clients faster than almost any other element. Mature trees, realistic ground cover, and contextual street elements ground the image.
- People and vehicles add scale. One or two human figures at the right scale confirm building height and entry proportions instantly — something no drawing can do as efficiently.
What clients do not need: furniture tags, material callouts, or dimension annotations in presentation renders. Those belong in the construction documents, not the approval deck.
How Do You Present Exterior vs Interior Renders Together?
Sequence matters as much as content. The most effective architect client decks move from outside-in: establish the building in its context first, then walk the client through the front door and into the key spaces.
A proven sequence for a mixed exterior/interior presentation:
- Aerial or site-context render — orient the client to the neighborhood and site
- Hero exterior (day) — establish massing, materials, and street presence
- Secondary exterior or entry — show the arrival experience
- Dusk or twilight exterior — create emotional impact, especially for residential
- Primary interior — the room that defines the project’s character
- Secondary interior — bedroom, amenity, or workspace
- Landscape or outdoor living view — close on lifestyle, not structure
This sequence mirrors how a real client would experience the building — from the street, through the entrance, into the rooms — which makes approval feel intuitive rather than forced. For projects where outdoor amenities are a key differentiator, a pool or landscape render placed near the end of the deck functions as a strong closer. Our exterior rendering service and interior rendering work are often packaged together specifically for this reason.
What File Formats and Sizes Work Best for Presentations?
For screen-based presentations (PowerPoint, Keynote, PDF, or web deck), export renders at 150–200 DPI at the native slide dimension — typically 1920 × 1080 px for widescreen. This keeps file sizes manageable (under 5 MB per image) without visible compression on a projected screen or large monitor.
For print presentations, brochures, or board submittals, request renders at 300 DPI at the intended print size. A full-bleed A3 or tabloid sheet requires a substantially larger source file — confirm this with your rendering studio before the project starts, not at delivery.
Key format notes:
- JPEG at high quality (90–95%) is fine for presentation decks and PDFs.
- PNG is preferable when the image will be composited into a layout with transparency or when maximum sharpness is needed for large-format print.
- TIFF is rarely necessary for client presentations but useful if the architect’s marketing team needs to retouch or recolor post-delivery.
- Always request a high-resolution master file alongside the presentation-optimized version — you will need it for signage, permit boards, and future marketing without re-rendering.
How Do Renders Reduce Revision Rounds and Change-Order Risk?
Renders reduce revision rounds by surfacing design misunderstandings before construction begins, not after. In our experience producing renders for architect approvals and competitions, the projects that invest in a full presentation package at design development consistently see fewer late-stage client-driven changes than those that delay visualization until permit submission.
The mechanism is straightforward: a client who approves a photorealistic render has already committed to the material palette, the massing, and the spatial character of the project. When they later request a change that contradicts what was approved, the architect has a documented visual reference to anchor the scope conversation. That reference protects fees and project timelines.
Renders also reduce internal revision rounds. When the design team, client, and consultants are all reacting to the same image rather than to their individual interpretations of a drawing set, misalignments surface early — in a meeting, not in a change order.
For a deeper look at how render packages support the full approval workflow, see our guide on architectural rendering for architect approvals.
Frequently Asked Questions
How early in a project should an architect commission 3D renders for a client presentation?
Commission at least a schematic-level exterior render before the first formal client presentation — typically at the end of schematic design. Early renders cost less because the model is simpler, and they prevent the most expensive problem in architecture: a client who approves a concept they did not actually understand.
Can renders be reused across different presentation types — client decks, permit boards, and marketing?
Yes, with planning. A render produced at full resolution for a client deck can be repurposed for permit boards, investor decks, and marketing collateral without re-rendering, provided the source file is high-resolution. Always request the master file at delivery, not just the presentation-optimized version.
What is the difference between a presentation render and a marketing render?
Presentation renders prioritize spatial clarity and design accuracy — they communicate the architect’s intent. Marketing renders prioritize emotional impact and lifestyle — they sell a feeling. The same base model can produce both, but the camera angles, lighting mood, and entourage (people, landscaping) are typically adjusted for each purpose.
How do I brief a rendering studio to get images that match my presentation structure?
Share your deck outline — not just the drawings. Tell the studio which image appears on which slide and what decision you need that image to support. A studio that understands the presentation context will choose camera angles, lighting, and crop ratios that serve the story, not just the geometry. See our rendering process guide for a full briefing checklist.
How much detail should interior renders show at the design development stage?
Enough to confirm the spatial character and material palette — not enough to lock every fixture. At design development, show the correct flooring material, ceiling height, window proportion, and primary furniture layout. Detailed fixture selections and millwork profiles belong in construction-document-stage renders, which come later and cost more to revise.
Ready to build a presentation package for your next project? Contact Ratio Visuals to discuss the right render mix for your client deck — we work with architects across the US and can scope a package to match your stage, timeline, and budget.
Last updated: September 2026