How to Brief a 3D Exterior Rendering: What to Send
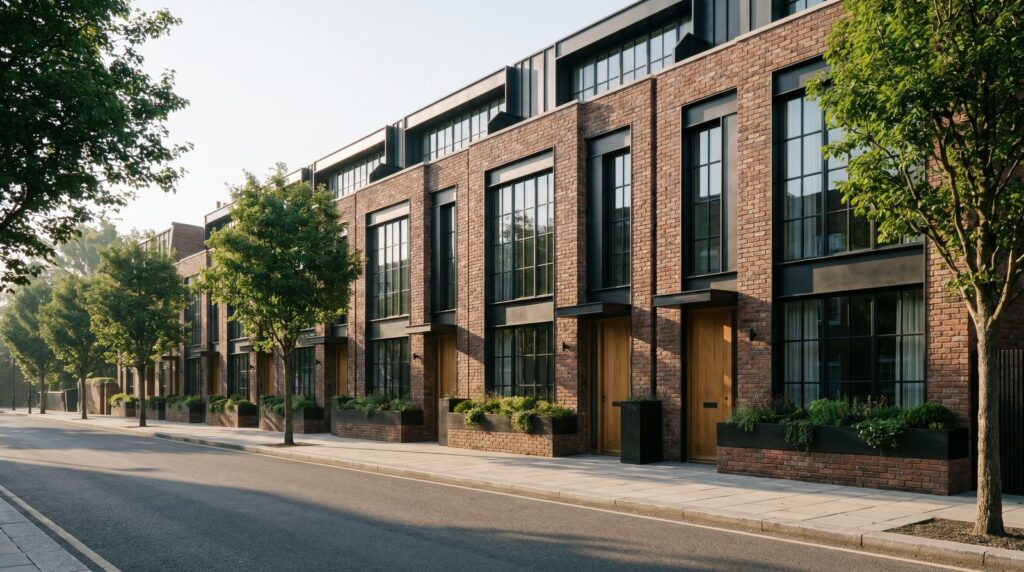
To get an accurate quote and a strong first draft, send your studio: architectural drawings (site plan, elevations, floor plans as PDF or DWG), a list of three to five camera angles, material callouts with manufacturer references or photo swatches, a site-context photo or Google Maps link, and your preferred lighting condition — day, dusk, or night. That single package eliminates the most common back-and-forth and lets production start within 24 hours.
What Files Does a Studio Actually Need to Start?
The minimum viable file set for an exterior rendering brief is a full set of architectural drawings: site plan, all four elevations, and at least one floor plan per level. These give the modeler the building’s geometry, footprint, and scale without ambiguity.
In our exterior work, the single biggest cause of delay is receiving only a single-elevation PDF with no site plan. Without the site plan, we cannot place the building correctly on its lot, set accurate shadow angles, or show the correct driveway and landscape relationship.
- CAD or DWG files — preferred; allow direct import into 3ds Max or SketchUp and reduce manual re-drawing time significantly.
- PDF drawings — acceptable if CAD is unavailable; include a scale bar or noted dimensions on every sheet.
- 3D model (Revit, SketchUp, Rhino) — if you have one, send it. Even a rough massing model cuts modeling time and improves accuracy.
- Reference photos — comparable built projects that match your design intent help calibrate photorealism expectations from day one.
- Survey or site plan with north arrow — essential for accurate sun-angle simulation and shadow studies.
See the full 3D rendering project brief checklist for a type-by-type breakdown across all render categories.
Which Views and Camera Angles Should You Specify?
Specify at least three camera positions — a primary street-level hero shot, a secondary angle showing the building’s relationship to the site, and one detail or entry close-up — and your brief is complete enough to quote accurately.
Studios price by view count, so vague requests like “a few angles” create scope disagreements later. Be explicit:
| View Type | What It Shows | When to Include |
|---|---|---|
| Street-level hero | Primary facade, landscaping, street context | Every project — this is the marketing anchor image |
| Corner or 3/4 view | Two facades, massing, depth | Any building with a prominent secondary facade |
| Entry/arrival detail | Lobby entrance, porte-cochère, signage | Multifamily, hospitality, commercial |
| Rear or courtyard | Amenity deck, pool, outdoor living | Residential, resort, mixed-use with outdoor amenity |
| Aerial or bird’s-eye | Site relationship, massing, neighborhood context | Master plans, large-scale multifamily, infill sites |
If you are unsure which angles sell best for your building type, our ultimate guide to architectural rendering walks through view selection by project category.
How Do You Communicate Materials, Finishes, and Cladding?
The most reliable way to communicate materials is to provide manufacturer names and product codes alongside a photo reference — for example, “James Hardie HZ10 Arctic White lap siding” paired with a product image is unambiguous; “light grey siding” is not.
Material miscommunication is the number-one cause of revision rounds in exterior rendering. Here is what to send for each finish category:
- Cladding and siding: manufacturer, product line, color name or code, and panel orientation (horizontal, vertical, staggered).
- Masonry and stone: species or product name, coursing pattern, mortar joint color. A physical sample photo shot in daylight is ideal.
- Glazing: glass tint (clear, bronze, low-e grey), frame color, and whether mullions are flush or projected.
- Roofing: material type (metal standing seam, shingle, flat membrane), color, and any visible profile detail.
- Trim and accent elements: RAL or paint brand color codes where possible; photo swatches as a fallback.
Linking to a manufacturer’s product page in your brief email is perfectly sufficient — studios pull the correct texture maps directly from supplier libraries when a clear product reference exists.
What Site Context and Landscaping Details Matter?
For a photorealistic exterior render, site context matters almost as much as the building itself — the surrounding streetscape, tree canopy, neighboring structures, and hardscape all determine whether the image reads as a real location or a building floating in a void.
Provide a Google Maps satellite link or a site survey showing the lot boundaries, adjacent structures, and street geometry. For landscaping, indicate:
- Planting palette preference (tropical, desert-adapted, temperate woodland, formal hedging) or a reference project photo.
- Hardscape material — concrete pavers, asphalt, decomposed granite, or specific product if specified.
- Whether mature or newly-planted tree scale is preferred (this changes the mood of the image significantly).
- Any site features that must appear: retaining walls, fencing, gates, signage, parking areas, or water features.
If the project includes a pool or outdoor living area, our landscape rendering service covers those elements as part of the exterior scope — note them in your brief so they are quoted together rather than as an afterthought.
How Do You Set Lighting Preferences: Day, Dusk, or Night?
Choose your lighting condition before production starts — it affects sky selection, shadow intensity, interior light spill, and the overall mood of the image, and switching conditions mid-production adds cost and time.
Each condition serves a different marketing purpose:
- Midday / overcast day: Neutral, high-detail read of materials and massing. Best for planning submissions and technical documentation.
- Golden-hour day (late afternoon): Warm, flattering light with long shadows. The most versatile choice for sales and marketing imagery.
- Dusk / twilight: Interior lights glow against a deep blue sky — creates an aspirational, lifestyle-driven image. Strong performer for luxury residential and hospitality marketing.
- Night: Dramatic, accent-lighting-led. Best for commercial, retail, and hospitality where illuminated signage and feature lighting are the story.
For a deeper comparison of how each lighting condition performs across project types, see our guide on choosing render lighting: day, dusk, or night. If your budget allows only one render, golden-hour day is the safest default for most residential and multifamily projects.
What Happens If You Send Incomplete Information?
Incomplete briefs do not stop production — they shift decision-making to the studio, which means the first draft reflects our best interpretation, not yours, and revision rounds increase.
In practice, the most common gaps we receive and their consequences:
- No site plan: Building is modeled in isolation; shadow angles may be incorrect for the actual lot orientation.
- Generic material descriptions: The studio selects plausible textures; color and scale may not match the specification.
- No camera angle guidance: The studio picks a standard hero angle; it may not show the facade feature you want to highlight.
- No lighting preference: Studio defaults to day; client wanted dusk — a condition change at revision stage costs time.
- Missing floor plans: Window and door placement on upper floors must be inferred from elevations alone, which increases modeling error risk.
A complete brief does not require a perfect design — concept-stage drawings are fine. The goal is to give the studio enough information to make intentional decisions rather than guesses.
How to Write a One-Page Brief That Gets Your Render Right First Time
A one-page brief that covers six fields — project description, file list, view count and angles, material callouts, site context, and lighting preference — is all a studio needs to quote accurately and start production with confidence.
Here is the exact structure we recommend to every client before production begins:
- Project overview (2–3 sentences): Building type, number of stories, location, and intended use of the renders (sales brochure, planning submission, investor deck).
- Files attached: List every file you are sending — drawings, model, survey, reference photos — so nothing is assumed missing.
- Views requested: Number of renders and a sentence describing each angle. Sketching camera positions on a plan printout and photographing it is perfectly acceptable.
- Materials schedule: One line per finish — element name, product/manufacturer, color code, and a reference image link or attachment.
- Site and landscape notes: Google Maps link, adjacent context to include or exclude, planting style, hardscape material.
- Lighting and mood: Preferred condition (day / golden hour / dusk / night) and one or two reference images that capture the mood you want.
This brief fits on a single page or in a single email. It does not require a formal document — a well-organized email with clearly labeled attachments works just as well as a PDF brief template.
When you are ready to submit your brief, our exterior rendering service page has a direct project intake form — upload your files and we will respond with a quote and timeline within one business day.
Frequently Asked Questions
Can I get a quote before my drawings are finalized?
Yes. Concept-stage drawings — even hand sketches or early massing models — are enough for a ballpark quote. The quote becomes binding once final drawings are submitted. Most studios, including ours, prefer early engagement so scope and timeline can be planned before your marketing deadline arrives.
Do I need a 3D model, or are 2D drawings enough?
2D drawings (site plan, elevations, floor plans) are sufficient to start. A 3D model in Revit, SketchUp, or Rhino speeds up the modeling phase and can reduce turnaround time, but it is never a requirement. If you have one, send it — if not, the studio builds the model from your drawings.
How many revision rounds are included in a typical exterior rendering project?
Most studios structure exterior rendering projects with two to three revision rounds included before final delivery. The number of revisions you actually need depends directly on brief quality — projects with complete material callouts and clear camera guidance routinely reach approval in one or two rounds.
What file format should I use to send drawings?
DWG or DXF is the most useful format because it imports directly into modeling software at the correct scale. PDF is the most common format received and works well provided every sheet includes a noted scale or dimension. Avoid sending only image files (JPG, PNG) of drawings — they cannot be measured accurately.
How long does an exterior rendering take from brief to delivery?
Turnaround depends on project complexity, view count, and current studio capacity. A single exterior view for a mid-size residential project typically moves from approved brief to first draft in five to seven business days. Multi-view packages for larger commercial or multifamily projects generally run ten to fifteen business days. Rush timelines are available — flag your deadline in the brief.
Last updated: July 2026