Custom Home Builder Renders: What to Show Clients at Every Stage
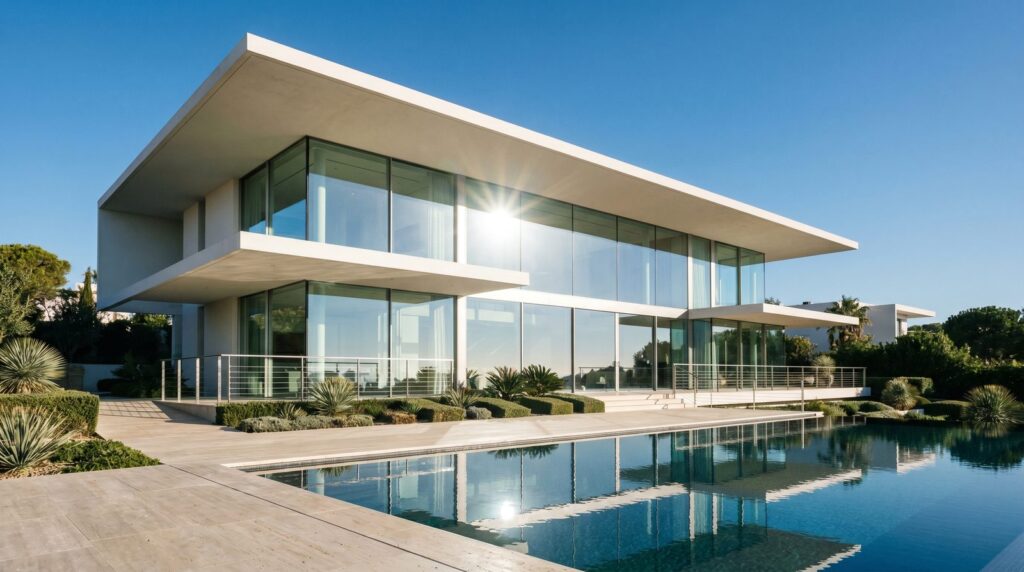
Custom home builders typically need three to six photorealistic renders per project: a primary exterior view, one or two secondary angles, and two to three interior renders of the rooms that drive the sale — usually the kitchen, primary suite, and main living area. That core package covers client approval, change-order prevention, and marketing. Add a dusk or aerial view when the site or architecture warrants it.
Why Custom Home Builders Need Renders (Not Just Plans)
Architectural plans communicate dimensions and relationships — they do not communicate how a home will feel. Custom home clients are spending more than they have ever spent on a single purchase, often making finish selections twelve to eighteen months before move-in. Plans ask them to imagine; renders show them exactly what they are buying.
In our experience working with design-build firms and custom builders, the projects that skip visualization tend to generate the most change orders — and change orders are where margin disappears. A client who approves a render of the kitchen island in Calacatta marble is far less likely to call three weeks into framing to request a layout change than one who only ever saw a floor plan.
Renders also serve a secondary function that builders often underestimate: they are the strongest marketing asset a builder can publish. A photorealistic exterior posted to Instagram, Houzz, or a builder’s website before a home is framed generates inquiries for the next project while the current one is still under construction. Exterior rendering is one of the most cost-effective marketing investments a custom builder can make on a per-lead basis.
Which Render Types Work Best at Each Stage of a Custom Build?
Different render types serve different purposes depending on where you are in the build cycle. Matching the right asset to the right stage prevents over-spending and ensures clients have what they need to make confident decisions.
| Build Stage | Recommended Render Type | Primary Purpose |
|---|---|---|
| Pre-contract / sales | Exterior hero render (day or dusk) | Win the client, showcase design intent |
| Design development | Interior renders (kitchen, living, primary suite) | Finish selection, client sign-off, reduce change orders |
| Permit / approvals | Exterior renders, site context view | HOA, municipality, or architectural review board submissions |
| Construction / marketing | Exterior + landscape render, aerial (if lot warrants) | Social media, Houzz, website, referral marketing |
| Pre-completion / handover | Outdoor living / pool render | Landscape contractor briefing, client visualization of stage 2 |
Exterior Renders: How Many Views Do You Actually Need?
For most custom homes, two exterior views cover the essential bases: a primary front-elevation angle and a secondary three-quarter view that shows the side facade and, where relevant, the garage or entry sequence. A third view — rear elevation or outdoor living area — is worth adding when the backyard is a major selling point.
Lighting choice matters more than view count. A single well-lit dusk render with warm interior glow and golden-hour sky will outperform three flat midday renders every time on social media and in listing photography. We consistently see dusk and twilight renders generate stronger client reactions and more marketing engagement than their daytime equivalents — particularly for coastal, Mediterranean, and contemporary styles where glazing and lighting are architectural features in their own right.
One view builders often overlook: the street-approach angle. Shooting the home from the sidewalk or driveway entry — the perspective a buyer or guest actually experiences — is often more emotionally resonant than a technically “correct” elevation shot. If you are choosing between a fourth view and upgrading one existing view to a dusk or golden-hour treatment, upgrade the lighting.
For homes on elevated lots, waterfront parcels, or large acreage, a contextual aerial render showing the home’s relationship to its site can be a powerful addition. It communicates what no ground-level view can: how the home sits in the landscape.
Interior Renders: Which Rooms Close the Sale?
Not every room needs a render. Custom home clients make their most emotionally charged decisions in three spaces: the kitchen, the primary bedroom suite, and the main living or great room. These are the rooms where finish selections are most complex, change orders are most expensive, and client anxiety is highest. Start there.
The kitchen render earns its cost many times over. It is the single space where countertop material, cabinet finish, hardware, backsplash tile, and appliance package all have to be visualized simultaneously. A client who approves a kitchen render before cabinetry is ordered is a client who will not call you six weeks later asking to switch from a shaker to a flat-panel door profile.
The primary suite — especially when it includes a featured bathroom — is the second priority. Wet-area finishes (large-format tile, freestanding tubs, frameless glass) are difficult to visualize from samples alone. An interior render of the primary bath reduces the risk of expensive post-installation changes dramatically.
For open-plan homes, a great room render showing the kitchen-dining-living relationship in one frame can replace two or three individual room renders, making it a high-value single asset.
How Do Renders Help Manage Client Change Orders?
Change orders are the primary margin risk in custom home building. Most originate not from bad design but from clients who could not visualize the finished product from plans and specifications alone. Renders close that visualization gap before construction begins.
The most effective workflow we have seen builders use: issue interior renders at the design-development milestone, require written client approval on each render before the relevant trade package is released to tender, and document the approved render alongside the specification sheet. This creates a clear paper trail that protects both the builder and the client.
Renders also help manage scope creep during construction. When a client requests a change, showing them the approved render alongside the proposed change — and the cost implication — makes the conversation concrete rather than abstract. Clients are less likely to pursue a change when they can see that the original design already delivers what they wanted.
For guidance on what information to gather before briefing a render studio, the 3D rendering project brief checklist covers exactly what a builder needs to prepare.
What Files and Plans Do You Need to Brief a Custom Home Render?
Briefing a render studio well is the single biggest factor in turnaround time and revision count. For a custom home project, you typically need to provide:
- Architectural drawings: Floor plans, elevations, and roof plan at a minimum. Section drawings help for complex volumes or split-levels.
- Site plan: Shows the home’s orientation, setbacks, landscaping zones, and relationship to neighboring structures or water features.
- Material and finish schedule: Cladding type and color, roofing material, window frame color, garage door style. Product names or manufacturer references are ideal.
- Landscape intent: Even a rough sketch or reference images help. Driveway material, lawn vs. garden beds, fence style, and tree placement all affect the exterior render significantly.
- Interior finish selections: For each room being rendered — cabinet color/profile, countertop material, flooring, wall paint or wallcovering, and key fixtures (pendants, faucets, hardware).
- Reference images: A Pinterest board or folder of images that capture the intended mood, style, and material palette. These are the fastest way to align on tone before modeling begins.
- Camera preferences: If you have a preferred angle or want to match a specific view from the site, a rough sketch or photo from that vantage point saves a revision cycle.
The more complete the brief, the faster the first draft and the fewer revision rounds. Incomplete briefs — particularly missing finish schedules — are the most common cause of extended timelines on custom home projects.
What Does a Custom Home Render Package Cost?
Render pricing for custom home projects varies based on several factors, and understanding those drivers helps you scope accurately before requesting a quote.
Complexity of the architecture is the primary driver. A clean contemporary box with flat rooflines and minimal detailing renders faster than a traditional home with multiple roof pitches, decorative trim, masonry columns, and custom millwork. More geometry means more modeling time.
Number of views and rooms scales cost linearly. Each additional exterior angle or interior room adds to the asset count. Bundling views into a package — rather than ordering individually — typically reduces the per-image cost.
Landscape and site complexity adds meaningful time. A home with a pool, detailed hardscape, mature trees, and a motor court takes longer to render than the same home on a simple lawn lot.
Lighting treatment affects both render time and the visual impact of the final asset. Dusk and twilight scenes require additional setup for artificial light sources, glowing windows, and sky replacement — but they are almost always worth the incremental cost for marketing use.
Revision rounds are usually included up to a set limit; changes beyond that limit are billed at an hourly or per-revision rate. A complete brief upfront is the most reliable way to stay within scope.
For a detailed breakdown of what affects render pricing, the 3D rendering cost guide covers every major variable.
Frequently Asked Questions
How many renders does a custom home builder typically need per project?
Most custom home projects are well served by three to six renders: two exterior views (front and three-quarter angle), one optional dusk or aerial, and two to three interior renders covering the kitchen, primary suite, and main living area. Larger or more complex homes with significant outdoor living areas may warrant additional assets.
Can renders be produced before architectural drawings are finalized?
Renders require at minimum a complete set of elevations and floor plans. They can be produced during design development — before permit drawings are finalized — which is actually the ideal time, since client approval on renders can inform final drawing revisions. Renders produced from incomplete drawings carry a higher risk of revision cycles.
What is the fastest way to get a custom home render produced?
Submit a complete brief at the start: elevations, floor plan, site plan, full finish schedule, and a reference image folder. Projects with complete briefs typically reach first-draft delivery in seven to fourteen business days. Incomplete briefs — particularly missing material selections — are the most common cause of delays and additional revision rounds.
Do renders help with HOA or architectural review board submissions?
Yes. Many HOAs and architectural review boards respond more favorably to photorealistic renders than to line drawings, because renders communicate massing, material, and neighborhood fit in a way that plans do not. A front-elevation exterior render is often sufficient for this purpose, and the same asset can be repurposed for marketing once approval is granted.
Should a custom builder use renders for marketing as well as client management?
Absolutely. A photorealistic exterior render published before a home is built generates inquiries for future projects, builds portfolio credibility on Houzz and Instagram, and can be used in brochures, email campaigns, and listing presentations. The same asset that manages a client’s expectations during design also serves as the builder’s strongest marketing material for the next sale.
Talk to the Ratio Visuals team about a render package for your next custom home project.
Last updated: October 2026