Exterior Render Camera Angles: Which Views Sell
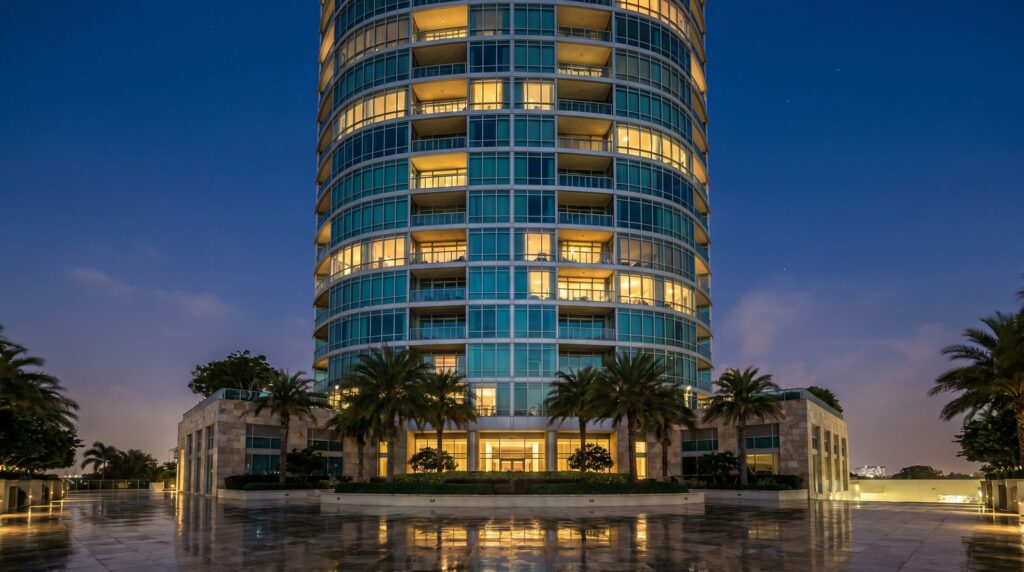
For an exterior architectural rendering, the most effective camera angles are: a street-level hero shot at roughly eye height (1.6–1.8 m) for the primary marketing image, a 45-degree corner view to show massing and depth, and one elevated or bird’s-eye view to establish site context. Most developers order two to four angles per building. The right choice depends on building type, lot geometry, and what the image must accomplish — pre-sales, planning approval, or investor decks.
Why Does Camera Angle Change How a Building Reads?
Camera angle is the single most powerful compositional decision in exterior rendering — it determines which facades are visible, how tall and imposing the structure feels, and what story the image tells. A low camera looking up makes a building feel monumental. An eye-level view placed across the street reads as approachable and contextual. A bird’s-eye view communicates site planning and landscape integration.
In our exterior work across multifamily towers, single-family custom homes, and commercial retail, we consistently find that developers who specify camera angles upfront get usable marketing assets on the first revision. Those who leave angle selection to the studio often request reshoots because the view doesn’t match the marketing narrative they had in mind. Angle is a strategic decision, not a technical one — make it early.
Focal length compounds the effect. A wide lens (24–28 mm equivalent) exaggerates depth and makes a building feel larger relative to its surroundings. A tighter lens (50–85 mm) compresses space and reads more like a composed architectural photograph. Neither is universally correct; the right choice depends on lot width, neighboring context, and intended use of the image.
Which Angles Work Best for Street-Level Hero Shots?
Street-level hero shots — camera placed at pedestrian eye height, typically 1.6 to 1.8 meters above grade — are the workhorse of exterior rendering because they replicate exactly what a future resident, buyer, or passerby will see. This is the view that belongs on a sales brochure cover, a listing page, or a hoarding board.
For the hero shot to read well, the camera should be positioned far enough back that the full building height is visible without extreme upward tilt. A good rule: the camera-to-building distance should be at least equal to the building’s height. On tight urban lots where that distance isn’t possible, a slightly wider focal length compensates — but avoid going below 24 mm equivalent or distortion becomes distracting.
Lighting matters enormously at street level. A dusk or golden-hour sky gives the hero shot warmth, activates interior lighting, and creates the emotional register that moves buyers. Our exterior rendering service almost always produces at least one dusk variant of the primary hero angle for this reason. Midday light is cleaner for planning submissions; dusk is stronger for marketing.
When Should You Use an Elevated or Bird’s-Eye View?
Elevated and aerial views are best when site context, landscape integration, or roof design carries meaningful value — for instance, a rooftop amenity deck, a pool courtyard, a coastal site with water frontage, or a masterplan where multiple buildings need to read together.
A drone-perspective elevated view (roughly 15–30 meters above grade, at an oblique angle) shows the relationship between the building and its surroundings without flattening the architecture the way a true vertical aerial does. This is the right choice for investor decks and planning presentations where decision-makers need to understand site coverage and massing in context.
True bird’s-eye views — looking almost straight down — are reserved for masterplans, large mixed-use sites, and landscape and pool rendering where the ground-plane design is the story. They rarely work as stand-alone marketing images for individual buildings because they strip away the human scale that makes architecture feel inhabitable.
For coastal or mountain projects, an elevated view looking back toward the building with the natural feature behind it can be the single most compelling image in the set. We’ve used this composition repeatedly for waterfront residential projects to lead with the view, not the facade.
How Do Corner Views Differ from Straight-On Elevations?
Corner views (camera positioned to show two facades simultaneously at roughly 30–45 degrees off the primary face) communicate massing, depth, and materiality far better than straight-on elevations. They are the standard choice for marketing renders because they show the building as a three-dimensional object rather than a flat diagram.
Straight-on elevations are not wrong — they are simply a different tool. They suit planning and approval submissions, where reviewers need to assess fenestration patterns, facade proportions, and material zones without the visual distortion of perspective. They also work for symmetrical buildings where the composition is strongest face-on: a classical courthouse, a symmetrical retail pavilion, a mid-century-influenced custom home.
For most residential and mixed-use projects, the corner view is the primary marketing angle and the straight-on elevation is a secondary or supplementary view. The table below summarizes when to use each.
| View Type | Best Used For | Typical Camera Position | Common Use Case |
|---|---|---|---|
| Street-level hero (corner) | Primary marketing image | 1.6–1.8 m, 30–45° off facade | Brochures, listings, hoardings |
| Street-level straight-on | Symmetrical buildings, approvals | 1.6–1.8 m, perpendicular to facade | Planning submissions, elevations |
| Low-angle hero (camera below 1 m) | Monumental or luxury feel | 0.5–1.0 m, slight upward tilt | Luxury residential, towers |
| Elevated oblique | Site context, landscape, amenities | 15–30 m above grade, oblique | Investor decks, planning boards |
| Bird’s-eye / aerial plan | Masterplans, large mixed-use | 60+ m above grade, near-vertical | Masterplan marketing, site plans |
| Courtyard / interior approach | Amenity spaces, entry sequences | Eye level, inside the site boundary | Multifamily lease-up, hospitality |
What Focal Length and Lens Height Should You Specify?
Focal length and camera height are the two technical parameters that most directly control how your building reads — and they are almost never specified in a client brief, which means the studio makes a default choice that may not match your intent.
As a practical guide: specify a 35 mm equivalent focal length for most residential marketing renders — it is wide enough to capture context without distorting the building. Use 50 mm for tighter, more editorial compositions. Go to 24–28 mm only when the lot is shallow and you need to show the full building height without tilting the camera far back.
Camera height drives perceived scale. Eye level (1.6–1.8 m) is neutral and approachable. Dropping to 0.6–1.0 m and tilting slightly upward makes even a two-story building feel imposing — useful for luxury custom homes. Raising the camera to 3–4 meters (roughly a second-floor vantage) can clear foreground obstructions like parked cars or hedges and gives a slightly elevated, composed feel without losing the street-level human connection.
Our exterior rendering specifications guide covers how to communicate these parameters in your brief, including the exact fields we ask for in our intake form.
How Many Camera Angles Do Developers Typically Order?
Most single-building projects — a custom home, a boutique multifamily building, a retail pad — are served well by two to four camera angles. A typical set for a residential developer looks like: one street-level corner hero at dusk, one daytime variant of the same angle for planning, one elevated oblique showing the site and landscape, and one courtyard or amenity view if the project has a meaningful outdoor space.
Larger mixed-use or multifamily projects with multiple building types or a complex site plan often require six to eight views — one hero per building type, an aerial masterplan view, and key pedestrian-level vantages through the site. High-rise condo towers frequently add a “from-above” view looking down from a high floor to show city or water views, which becomes a strong pre-sales asset.
The right number is driven by how many distinct stories the project needs to tell, not by a formula. If every angle shows the same facade in slightly different light, you are over-ordering. If your investor deck needs to communicate site planning, building character, and amenity quality simultaneously, three angles probably isn’t enough.
See our 3D rendering project brief checklist for a structured way to think through how many views your project actually requires before you brief a studio.
How Do You Brief Your Studio on the Exact View You Need?
The most efficient way to brief a camera angle is to combine a reference image (a photo or sketch showing the approximate vantage) with a written description of the camera position: height above grade, approximate distance from the building, compass direction, and any specific feature that must be visible (entry canopy, corner balcony, pool, signage).
A Google Street View screenshot of a comparable building from the angle you want is often the fastest communication tool available — it removes ambiguity about height, distance, and field of view in a way that words alone cannot. Annotate it with a quick note about what you want to emphasize and what can be cropped out.
For new sites without existing context, a site plan with a camera position marked and an arrow showing the view direction gives the studio everything it needs to set up the scene correctly from the first draft. Include the compass orientation so the studio can model accurate sun position for the time of day you want.
Our full guide on how to brief a 3D exterior rendering walks through every element of a complete brief — camera angles, materials, lighting conditions, and reference imagery — so your first revision is as close to final as possible.
Frequently Asked Questions
What is the best camera angle for a residential exterior rendering?
For most residential projects, a street-level corner view at eye height (1.6–1.8 m) positioned 30–45 degrees off the primary facade is the strongest marketing angle. It shows massing, depth, and materiality simultaneously. A dusk lighting condition on this angle typically produces the highest-performing image for listings and brochures.
Should I use a wide-angle or standard lens for exterior renders?
A 35 mm equivalent focal length is the most versatile choice for exterior marketing renders — wide enough to capture context without distorting the building. Use 50 mm for a tighter, more editorial feel. Reserve 24–28 mm for tight urban sites where you cannot step back far enough to capture the full building height at standard focal length.
How do I communicate the camera angle I want to my rendering studio?
Combine a reference photo or Street View screenshot showing the approximate vantage with a written note specifying camera height above grade, distance from the building, compass direction, and any feature that must be visible. On new sites, mark the camera position and view direction on the site plan. The more specific you are, the fewer revision rounds you need.
Do I need a bird’s-eye view for every exterior rendering project?
No. Bird’s-eye and elevated aerial views are most valuable when site planning, landscape design, rooftop amenities, or a masterplan context need to be communicated. For a single custom home or small retail building, a street-level hero and one secondary angle typically cover all marketing needs without the added cost of an aerial view.
How many exterior rendering angles should I order for a multifamily project?
A standard multifamily set is three to five angles: one street-level hero, a daytime planning variant, an elevated site view, and one or two amenity-level views (courtyard, pool, entry). Larger mixed-use or multi-building sites may require six to eight views to cover each building type and key pedestrian sequences through the development.
Ready to specify your camera angles and get a quote? Visit our exterior rendering service page or contact us to discuss your project.
Last updated: September 2026