3D Building Rendering: What It Costs & What to Expect
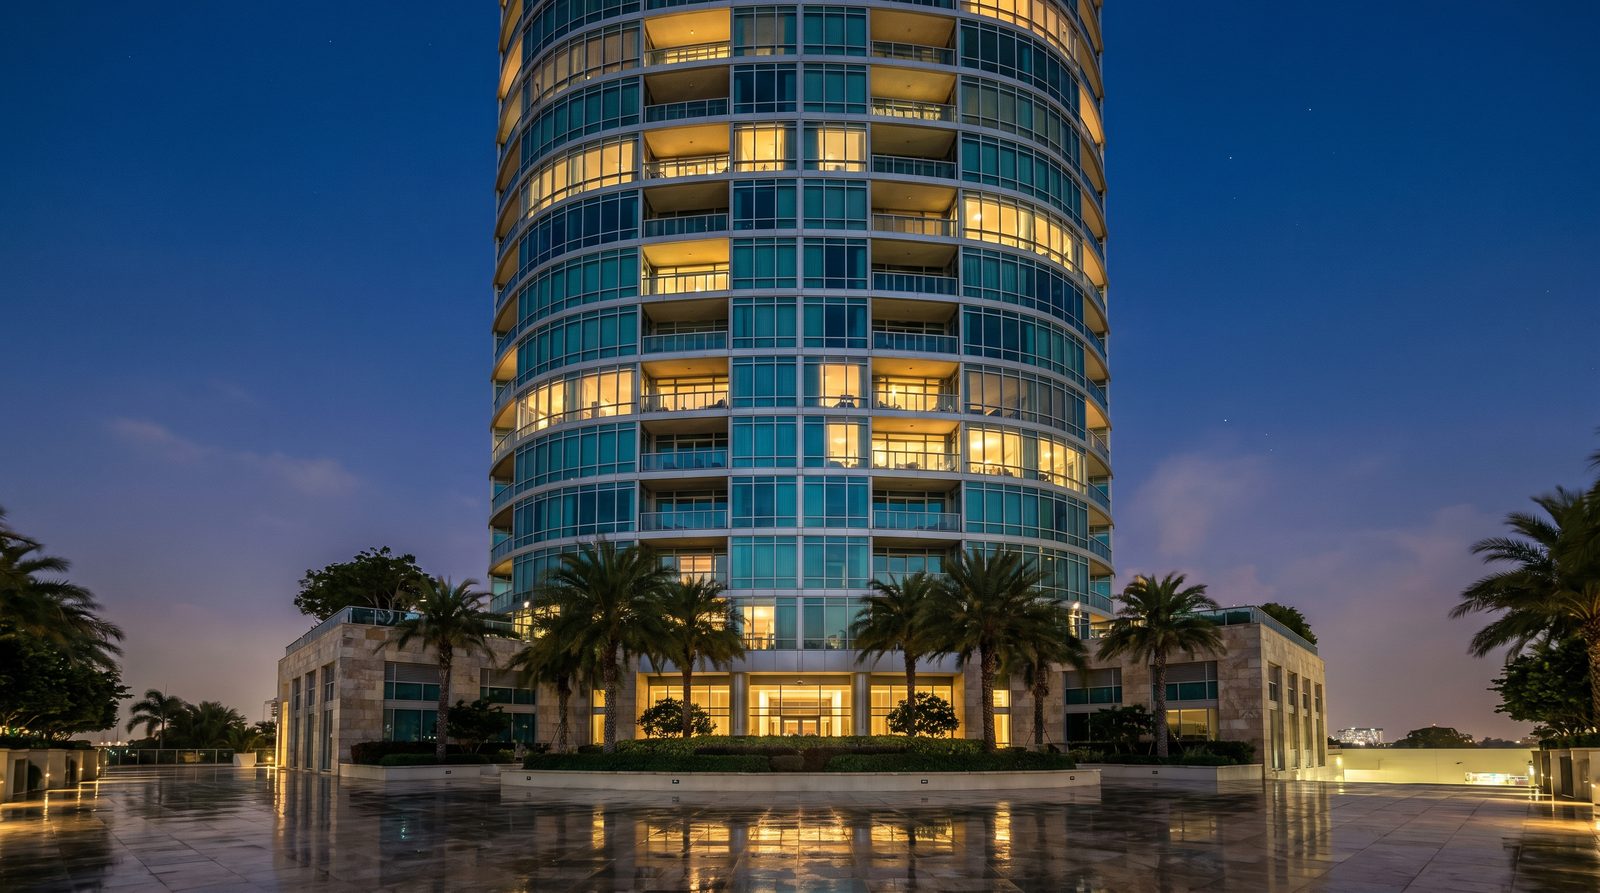
A 3D building rendering is a photorealistic still image—or sequence of images—produced from architectural drawings before a structure is built. Studios use it for pre-sales campaigns, planning approvals, investor decks, and marketing collateral. What you pay depends on building type, number of views, scene complexity, lighting conditions, and revision cycles—not a single flat rate. Understand those drivers and you can scope a project accurately from day one.
What Is a 3D Building Rendering?
A 3D building rendering is a computer-generated image that shows a proposed structure as if it were already built and photographed. The artist constructs a three-dimensional model from your drawings, applies physically based materials (PBR), places it in a site context with landscaping and entourage, then renders it under realistic lighting—whether that is bright midday sun, a soft overcast, or a dusk golden-hour shot.
The output can be a single hero exterior, a full suite of exterior and interior views, an aerial perspective, or an animated walkthrough. Each format serves a different stage of the development or design process.
The Main Types of Building Renders
- Exterior street-level renders — the most common deliverable; shows the façade, materiality, and streetscape context. Used in listings, brochures, and planning submissions.
- Aerial / bird's-eye renders — shows the building in its full site context; essential for masterplan presentations and large mixed-use or multifamily projects.
- Interior renders — lobby, amenity spaces, unit types, or commercial tenancy fit-outs. Closes the gap between a floor plan and a buyer's imagination.
- Dusk / twilight renders — exterior shot at golden hour with interior lights glowing. High emotional impact for marketing.
- Animated walkthroughs — a moving camera path through or around the building. Higher production cost but powerful for launch events and social media.
- 3D floor plans — overhead perspective renders that replace flat 2D plans in listing portals and brochures.
For hospitality projects specifically, see our guide on what hospitality developers need from 3D rendering. For retail and food-and-beverage spaces, the retail and restaurant rendering guide covers what to show before you build.
What Drives the Cost of a 3D Building Rendering?
There is no universal list price because every project has a different cost profile. The factors below are the real levers—understanding them lets you control spend without sacrificing quality.
| Cost Driver | Why It Matters | How to Manage It |
|---|---|---|
| Building scale & complexity | A 40-storey tower with curtain-wall glazing, cantilevered floors, and intricate cladding takes far longer to model than a straightforward single-family home. | Prioritise the views that will actually be used; not every elevation needs a hero render. |
| Number of views | Each additional camera angle requires a new composition, lighting pass, and post-production. Volume packages reduce per-image cost. | Batch views from the same scene together—they share the model-build cost. |
| Lighting conditions | Dusk and night renders require HDRI environment setup, interior light rigs, and longer render times versus a standard daylight shot. | Decide on lighting before production starts; changing from day to dusk mid-project adds time. |
| Site context & entourage | Populating a scene with accurate landscaping, vehicles, pedestrians, and neighbouring buildings increases realism but also modelling time. | Provide a site survey or context photos early; stock libraries cover most standard entourage. |
| Interior finish specification | Custom stone profiles, bespoke joinery, and branded FF&E each need individual material builds. Generic finishes use library assets. | Supply finish schedules and product spec sheets; guesswork always costs revision rounds. |
| Animation length & motion | A 60-second walkthrough at cinematic quality can take many times longer to produce than a single still—render farms and compositing add up. | Script the camera path tightly; unnecessary movement is pure cost with no marketing return. |
| Revision cycles | Design changes after modelling is complete—façade revisions, material swaps, added floors—restart significant portions of the workflow. | Lock drawings before briefing. Even a design-development set is better than a concept sketch. |
| Turnaround requirement | Rush delivery compresses the schedule, which means dedicated resources and overtime. Standard lead times are always more cost-efficient. | Build rendering into the project programme early rather than ordering at the last minute. |
For a detailed breakdown of how these drivers translate to real project scoping, visit our rendering cost guide.
What to Provide to a Rendering Studio
The quality and speed of your renders are directly proportional to the quality of the brief you provide. Studios do not need a construction-ready set, but they do need enough information to model accurately.
- Floor plans, elevations, and sections — CAD, Revit, or PDF. The more resolved the drawings, the fewer assumptions the modeller makes.
- Finish schedule & materials board — cladding type, glazing spec, roofing, trim colours. Include manufacturer references where possible.
- Site plan or survey — orientation, slope, neighbouring structures, street width. Critical for accurate sun angles and context.
- Reference images — mood references for lighting, landscaping style, and desired atmosphere. A Pinterest board or PDF is fine.
- Camera angle preferences — a rough sketch or annotated site plan showing where you want the viewer to stand.
- Intended use — print resolution for hoardings differs from web resolution for a listing portal; state both if needed.
Our exterior rendering specifications guide goes deeper on materials, lighting choices, and camera angle strategy.
Building Types and Their Rendering Needs
Different building categories have distinct rendering priorities, which shapes both the view mix and the level of detail required.
Multifamily and Residential
Townhouse and mid-rise multifamily projects typically need a street-level hero, a dusk variant for marketing, and at least one interior amenity view. Buyers respond to lifestyle cues—landscaping, outdoor living, and natural light matter as much as the façade itself. See the townhouse rendering guide for what HOAs and buyers specifically want to see.
Commercial and Mixed-Use
Office, retail, and mixed-use buildings often need an aerial context view alongside street-level shots, because investors and planning boards want to understand how the building sits within the precinct. Lobby and tenancy renders support leasing campaigns before the building opens.
Hospitality
Hotels and resorts demand the widest view mix: exterior arrival, pool deck, lobby, guestroom, and F&B spaces. Dusk lighting is almost always specified for the hero exterior. The emotional register of hospitality renders is higher than for straight residential—atmosphere is the product.
Landscape and Outdoor Living
Pool decks, rooftop amenities, and resort-style landscaping are increasingly the deciding factor in a multifamily lease-up. A standalone landscape render suite—day and dusk, with and without people—can justify its cost in a single weekend of open homes. The landscape and pool rendering guide explains the process in full.
The 3D Building Rendering Process: Step by Step
- Brief and scope — studio reviews your drawings, agrees on view list, lighting conditions, resolution, and timeline. A detailed brief prevents scope creep.
- 3D modelling — the building is built as a three-dimensional geometry model. Accuracy here determines everything downstream.
- Material and texture application — PBR materials are applied: glass reflectance, concrete roughness, timber grain, metal specularity. Custom materials are built from your spec sheets.
- Lighting and environment setup — HDRI sky domes, sun position, artificial light rigs for dusk shots, and camera placement are configured.
- Scene population — landscaping, entourage (people, vehicles, street furniture), and site context are added.
- Test renders and client review — low-resolution draft renders are shared for composition, material, and lighting approval before full-resolution production.
- Final render and post-production — high-resolution render pass followed by colour grading, atmosphere, and any 2D compositing in post.
- Delivery — high-res TIFFs or JPEGs at agreed resolution, plus web-optimised versions. Source files retained per studio policy.
When to Commission 3D Building Renders
The earlier in the project lifecycle you commission renders, the more value they return. Pre-sales campaigns that launch with photorealistic visuals consistently outperform those relying on 2D plans alone—buyers and investors make emotional decisions, and a floor plan does not trigger emotion. Our pre-sales rendering playbook for developers covers the full strategy.
Planning submissions also benefit from high-quality renders. A well-composed exterior showing the building in its streetscape context, with accurate materiality and scale, addresses many of the objections planning boards raise before they are voiced.
In-House vs. Outsourced Rendering
Some larger architecture firms maintain in-house visualisation teams. For most developers and smaller practices, outsourcing to a specialist studio is more cost-effective: you pay for completed deliverables rather than carrying salaries, software licences, render-farm costs, and the ongoing training required to keep pace with rendering technology. A specialist studio also brings a library of entourage assets, tested material libraries, and a workflow refined across hundreds of projects.
From our own studio experience producing photorealistic renders for US developers and architects, the projects that deliver the best ROI are those where the developer treats rendering as a marketing investment—not a line item to cut—and briefs the studio with resolved drawings and a clear view list from the start.
Explore the full range of deliverables we offer at exterior rendering services and interior rendering services.
Frequently Asked Questions
How many views do I need for a building rendering project?
Most single-building projects start with two to four exterior views: a primary street-level hero, a secondary angle showing a different elevation, and a dusk variant of the hero. Interior suites add views per room type. Volume increases per-project cost but reduces cost per view, since the model is already built.
What file formats do I need to provide to a rendering studio?
CAD (DWG/DXF), Revit (RVT), SketchUp (SKP), or PDF drawings are all workable starting points. The more resolved and dimensionally accurate the files, the less modelling time is required. Finish schedules, material specs, and site plans should accompany the drawings from day one.
How long does a 3D building rendering take to produce?
A single exterior render with a standard brief typically takes five to ten business days from approved drawings to final delivery. Complex projects—towers, large mixed-use, or animation—take longer. Rush turnarounds are possible but carry a premium. Planning ahead is always the most cost-efficient approach.
Can renders be updated if the design changes?
Yes, but design changes after modelling is complete add cost and time proportional to the extent of the revision. Minor material or colour swaps are straightforward. Structural changes—floor count, massing, façade reconfiguration—may require rebuilding significant portions of the model. Lock drawings before briefing where possible.
What resolution do I need for print versus digital use?
Web and listing-portal use typically requires 72–96 DPI at screen dimensions. Large-format print—hoardings, banners, exhibition panels—needs 150–300 DPI at the final print size, which can mean very large pixel dimensions. State all intended uses at briefing so the studio renders at the correct resolution from the start.
Talk to the Ratio Visuals team about your building rendering project →
Last updated: November 2026